Self-Service Provisioning with the Crossplane Service Broker
6. May 2021
Tobias Brunner’s lightning talk at Crossplane Community Day Europe 2021.
Watch the recording
The Crossplane Service Broker exposes Crossplane primitives via the Open Service Broker API. Tobias will introduce the concepts behind the Crossplane Service Broker and demonstrate to the audience how it all works together. By leveraging the Open Service Broker API while coupling it with the powerful concept of Crossplane Compositions it’s very easy to enable users of a platform which exposes Open Service Broker API integration (like Kubernetes Service Catalog or Cloudfoundry) to provision services fully automated. In a demonstration a real use case will be shown how a Redis service can be provisioned using the Open Service Broker API, leveraging the Crossplane Compositions and the Helm provider.
VSHN has been a fan of Crossplane since its very early days in 2019. Since then the project has matured a lot and is now used in production by VSHN and many others. In mid 2020 Crossplane became a CNCF Sandbox project and lately applied to be promoted to be a CNCF Incubation project. It’s time for an introduction to Crossplane, why it matters to VSHN and talk about our production usage.
This blog article is also available as a video talk (with corresponding slides).
Use Case: Self-Service Marketplace with Crossplane Service Broker
The very first use case we were able to fulfill by using Crossplane is a project for a VSHN customer who provides a self-service marketplace to their internal customers (developer and service teams). This marketplace is available in their internal Cloudfoundry environment, presented as a one-click service provisioning web-interface. Via this interface, the end-user can order a MariaDB Galera Cluster or a Redis Cluster with different characteristics (e.g. available storage or memory), called Service Plans, with one click. This infrastructure runs in an on-premise datacenter which doesn’t provide any of the well-known hyperscaler services and APIs. We were able to use the Crossplane Helm Provider to deploy services which are specified by Crossplane Composite Resources and Compositions.
In the world of Cloudfoundry the Open Service Broker API is used to provision and manage services. To have a native integration in to the marketplace we developed a Crossplane Service Broker which maps the concepts of the Open Service Broker API specification to the concepts of Crossplane. As they match very well, the integration and translation between these two APIs is very easy.
This concept lays the foundation for many upcoming new services of VSHN, under the name “Application Catalog”. Watch out this space for more articles about this topic!
What is Crossplane?
In short:
Crossplane is an open source Kubernetes add-on that enables platform teams to assemble infrastructure from multiple vendors, and expose higher level self-service APIs for application teams to consume, without having to write any code.
To achieve this promise, Crossplane brings three main features with it:
Providers: These are the pluggable building blocks to provision and manage infrastructure. Each provider enables the use of an upstream or third-party API, for example of a cloud provider, and manages the abstraction to it by bringing Kubernetes custom resources (CRDs) with it. These custom resources are called “managed resources” in the Crossplane world and resemble the upstream API as closely as possible. As each upstream provider has its own opinionated API, Crossplane aligns these interface by providing its own opinionated structure, the Crossplane Resource Model, abbreviated XRM. This allows for example to have a unified API for things like status conditions and references. Crossplane itself brings already a lot of providers out-of-the-box and under the crossplane-contrib GitHub organization a lot of third-party providers are being developed.
Compositions: This is a Crossplane specific construct which enables the possibility to define new custom APIs – called “composite resources” (XR) – which provide a pre-configured set of managed resources. By predefining a set of managed resources – called “composition” – the end-user of the platform (e.g. the developer) is being enabled to get infrastructure in an actually usable self-service way. The user doesn’t have to care about the inner details of for example an AWS RDS instance which most of the time needs a lot of configuration and other objects (VPC, networking, firewalling, access control). This work is done by the platform team.
Packages: Sharing opinionated infrastructures is done by packaging up all the resources (XRD, Provider, Compositions) in to a package and re-distributing it as a standard OCI image.
The three core features described above in itself are already very cool, but we feel that there is much more behind it.
As Crossplane leverages the Kubernetes API and concepts, it enables a lot of possibilities:
Usage of a well-known API. There is no need to learn a completely new API.
This allows to re-use tooling like GitOps to declaratively manage infrastructure.
The infrastructure is defined in the same language (Kubernetes API style) as the application deployment is described. No need to learn a new domain-specific language.
With that there can be one place which describes everything needed to run an application, including all the infrastructure needs (databaes, caches, indexes, queues, …).
As Crossplane is a Kubernetes operator, it has reconciliation built into its heart and therefore all the time actively makes sure that the infrastructure adheres to the defined state. Manual changes to the infrastructure will be rolled-back immediately. No configuration drift is possible this way.
Battle-tested Kubernetes RBAC rules help to control access to infrastructure provisioning and management.
Kubernetes is much more than “just” container orchestration. It’s the platform aspect that counts, the well-defined API and the concepts of the control-loop. Crossplane brings this to the next level, making Kubernetes more independent of containers than ever before.
VSHN lately updated its company beliefs in which we set out to bet on Kubernetes as the technical foundation for everything we do in the future. With Crossplane we can now even provision all the infrastructure we need straight out of Kubernetes, no need to use another, disconnected tool anymore.
One API to rule them all:
Core Kubernetes APIs to orchestrate application containers Crossplane APIs to orchestrate infrastructure
Comparison to other Infrastructure as Code tools
The above description might already shed some light where the differences to other Infrastructure as code tools like Terraform, Pulumi or Ansible are.
Why not Terraform?
When directly comparing Crossplane with Terraform the most important aspect is that Terraform is a command-line (CLI) tool acting on control-planes, where Crossplane is a control-plane itself which is active all the time.
To configure infrastructure with Terraform, the user has to declare the intended architecture in the domain specific HashiCorp Configuration Language (HCL). After that the CLI has to be invoked manually which starts Terraform to plan and actually apply the configuration. After that the current state is stored in a state file to represent the current infrastructure. When something changes in the infrastructure without telling Terraform about it, the stored state differs from the actual state and on the next CLI invocation no-one knows what happens. Also, when only wanting to change something on one of the probably many provisioned services, Terraform always configures all services which could take a long time and affect other services as well, unintended. Automating Terraform is very hard because of these and many other issues. Many more aspects are discussed in Crossplane vs Terraform.
That doesn’t mean Terraform is bad, it’s just a completely different approach to manage infrastructure.
Why not cloud specific Kubernetes operators?
Many, if not all, of the big cloud providers (Hyperscaler) are providing a native Kubernetes operator to manage their cloud of out Kubernetes: Google Cloud has their Config Connector, Azure the Service Operator and AWS the Controllers for Kubernetes. All these operators are specific to the cloud they are engineered for and are providing low-level access to their services. While it’s perfectly fine to use them, Crossplane provides an abstraction layer where the same APIs can be used cross-cloud and presents the platform user the same API, independent on which cloud the cluster is running on and how all the services are named. By leveraging the Composition feature of Crossplane the user doesn’t have to care what all is needed to properly provision a service: For example a production-grade AWS RDS instance has hundreds of configuration values and needs networking, security group, API connection secret, user, schema and grants. This all can be easily abstracted by Crossplane Compositions. An in-depth discussion can be found in Crossplane vs Cloud Provider Infrastructure Addons.
Keeping up with infrastructure providers
Cloud providers are constantly adding and changing services. The Crossplane providers somehow have to keep up with that. As it’s nearly impossible and also impractical to manually keep up with the changes, the Crossplane developers have engineered tools to generate Crossplane providers out of already existing and well maintained SDKs.
Examples:
Because Terraform has a huge user base, a lot of upstream providers are already supported and are implemented as Terraform providers. Crossplane is working on a way to generate Crossplane providers out of Terraform providers. See Adding VMware support to Crossplane using Terraform Provider Generation for an example how VMware support is provided by leveraging the already very complete Terraform provider.
To better understand Crossplane, a few Crossplane specific terms will need an explanation:
Providers: Extends Crossplane to enable infrastructure resource provisioning. In order to provision a resource, a Custom Resource Definition (CRD) needs to be registered in the Kubernetes cluster and its controller should be watching the Custom Resources those CRDs define.
Managed Resources: The Crossplane representation of the cloud provider resources and they are considered primitive low level custom resources that can be used directly to provision external cloud resources for an application or as part of an infrastructure composition.
Crossplane Resource Model (XRM): Standardization between all providers, defining for example the status properties and resource references.
Composite Resource (XR): A special kind of custom resource that is composed of other resources. Its schema is user-defined.
Composite Resource Definition (XRD): Defines a new kind of composite resource, and optionally the claim it offers.
Composite Resource Claim (XRC): Declares that an application requires a particular kind of infrastructure, as well as specifying how to configure it.
Composition: Specifies how Crossplane should reconcile a composite infrastructure resource – i.e. what infrastructure resources it should compose. It can be used to build a catalog of custom resources and classes of configuration that fit the needs and opinions of an organization.
Video introduction
Tobias Brunner
Tobias Brunner is working since over 20 years in IT and more than 15 years with Internet technology. New technology has to be tried and written about.
Latest news
Events
General
Tech
Cloud Native Computing Switzerland Meetup – March 2026 Recap
We are thrilled to announce the second edition of our “DevOps in Switzerland” report!
From autumn 2020 until early this year we conducted a study to learn how Swiss companies implement and apply DevOps principles.
We compiled the results into a 30-page PDF file (only available in English), and just like in the previous edition, we provided a short summary of our findings in the first pages.
You can download the report directly from our website. Enjoy reading and we look forward to your feedback!
Aarno Aukia
Aarno is Co-Founder of VSHN AG and provides technical enthusiasm as a Service as CTO.
Latest news
Events
General
Tech
Cloud Native Computing Switzerland Meetup – March 2026 Recap
We have noticed that many of our customers struggle to understand how TLS certificates work on a conceptual level. For example, how does “signing” work? What does it even mean? What are a “chain”, an “intermediate” or a “root”? Why do intermediates belong to a chain, but not the root? What is a CSR? How do CSR, Key, and certificate work together? And so on.
This series is an attempt to explain these critical concepts to our customers, starting this first part with the basic vocabulary and knowledge to get started.
HTTPS – TLS – SSL
Let’s talk about what we want to achieve first. When you visit a website via plain old HTTP, an attacker could intercept your request and grab any private information like usernames and password. Additionally, there is no way for you to verify that you indeed connected to the server you intended. An attacker could have modified the DNS response (which is also unencrypted) to send your browser to their server instead. See Man-in-the-middle attack on Wikipedia for more examples.
So in order to verify the identity of the server we connected to, and to make sure nobody except the server and our browser can read the data we exchange, websites these days use TLS (“Transport Layer Security”, or its predecessor SSL “Secure Sockets Layer”) to both authenticate the server and encrypt the traffic.
From a technical perspective, TLS sits between TCP and HTTP on the protocol stack, and while it’s mostly known for being the S (for Secure) part in HTTPS, it’s noteworthy that it can be used for other protocols as well. Some examples:
The last thing to note here is that there are different versions of TLS (and SSL), and some of them are not considered secure anymore!
From oldest to newest, at the time of writing (March 2021):
SSLv1: Insecure, not supported anymore
SSLv2: Insecure, not supported anymore
SSLv3: Insecure, not supported anymore
TLS 1.0: Insecure, deprecated
TLS 1.1: Insecure, deprecated
TLS 1.2: OK
TLS 1.3: OK
Keep this in mind when planning your environment! You wouldn’t want to protect your brand new microservice with outdated security protocols!
By the way, if you want to check which TLS versions a website supports, use SSL Labs’ SSL Server Test. It’s a great debugging tool and will show you a lot of information about the topics of this Blog post series!
A Certificate is a cryptographically signed piece of information, of which the most important part is the Subject, which identifies who this certificate belongs to, as well as the Issuer. Other attributes include details about when the certificate is about to expire as well as a lot of technical information about the key and signature algorithms used, and so on.
The Subject and Issuer of a certificate are characterized by a set of attributes:
CN – Common Name
C – Country
ST – State
L – Location (City)
O – Organisation
OU – Organisational Unit
Together, those attributes form a Distinguished Name (DN). Most attributes are optional, except for the Common Name. In the case of Server Certificates, the CN must match the address used to connect, for example www.vshn.ch.
The Certificate also contains a Public Key (embedded in the certificate) and its matching Private Key.
The last important feature of X.509 certificates is that they are signed by other certificates (or itself). Once a certificate is signed, its contents cannot be changed anymore.
Signing CAs
The Internet is a big place, so how do we know whom to trust? To solve this issue, the concept of Certificate Authorities came up.
A Certificate Authority (commonly referred to as CA) is a central trusted source of certificates. They have a CA Certificate (also known as the “root” certificate) that is well known and trusted. This certificate is only used to sign other certificates. By signing another certificate, the CA confirms “yes, I trust this certificate and the information in it is correct.”
A related concept is a Certificate revocation list, also known as “CRL”, which is a list of digital certificates that have been revoked by the CA before their scheduled expiration date, and should therefore no longer be trusted.
Now that we have explained what a certificate is, let’s talk about keys.
Keys
Each certificate has its own key. The key makes certificates actually useful; without them, they would not work.
Each key consists of two parts: a public key and a private key. While the public key is embedded as part of the certificate itself, the private key is stored in a different file altogether.
In order to sign another certificate, you need the Private key of the signing certificate (but not of the certificate you want to sign).
When you open a connection to a server, the server also needs the private key of the server certificate in order to authenticate itself and establish encrypted communication.
A very important thing to understand is that the key is the only confidential piece in the puzzle; needless to say, it is the most important piece! So please, keep this always in mind: do not ever exchange keys over unsecured channels, under any circumstances!
On the other hand, the certificate itself is not confidential. The CA certificate in particular must be provided to all clients and servers, in order to verify other certificates.
How can a client ask a CA to sign a certificate? Through a CSR (also known as Certificate Signing Request) which, as the name implies, performs exactly this task.
Coming Up
Speaking about verification and issuing new certificates, we are going to talk about these subjects in detail, respectively in the second and third parts of this series. Stay tuned!
Aarno Aukia
Aarno is Co-Founder of VSHN AG and provides technical enthusiasm as a Service as CTO.
Latest news
Events
General
Tech
Cloud Native Computing Switzerland Meetup – March 2026 Recap
We are thrilled to announce the general availability of K8up version 1.0!
New K8up Logo
K8up (pronounced /keɪtæpp/ or simply “ketchup”) is a Kubernetes Operator distributed via a Helm chart, compatible with OpenShift and plain Kubernetes. It allows cluster operators to backup PVCs; to perform on-demand backups; or to schedule regular backups. K8up is written in Go and is an Open Source project hosted at GitHub.
This new version is a full rewrite of the operator, based on the Operator SDK. This provided us with a more stable code base, with extended testing, paving the way for future improvements and new features.
Speaking about which; some of the new features in version 1.0 are:
Support for Kubernetes 1.20.
K8up status printed when using kubectl get or oc get.
Run multiple replicas of K8up for high availability.
Specify Pod resources (CPU, memory, etc.) from different levels.
New random schedules (e.g. @daily-random) to help distribute the load on the cluster.
I think it can be said that at VSHN we have a certain obsession with documentation. This goes beyond the requirements set by our customers, or by those imposed by certifications such as the ISO 27001 or ISAE-3402. We have found that as a team we can work better when we can refer to written documentation at all times.
In the past few years we have standardized our documentation toolkit: we have adopted Asciidoctor as the lingua franca for our documentation. We have put in production various documentation websites based on Antora: our Handbook, our Knowledge Base, and the Project Syn documentation are some examples.
That works great for text. But what about diagrams? Our documentation has lots of them, and although embedding PNG files works fine, it does not “scale” very well.
For that reason we have set up an instance of Kroki in production (in APPUiO, of course!), to enable the generation of SVG diagrams based on various formats: PlantUML for UML diagrams, Nwdiag for network diagrams, and Ditaa for simple box-and-arrow kind of diagrams, all produced and shown in a crisp and neat SVG format. We love Kroki! It is such an awesome idea, that it has even been integrated to GitLab as a supported diagramming tool. How cool is that? In general, the Asciidoctor ecosystem has very good integration of diagrams into workflows, and this extends to Antora as well.
I am not going to dive into the benefits of vector vs. raster images; I think the readers of this article are well aware of the bonuses the former has over the latter. SVG diagrams look great in both online and print, but they can be a bit complicated to draw by hand (duh!).
But here’s a confession: I’m not a big fan of editing text-based diagrams either. But that’s just a personal choice. And the truth is, many other non-technical VSHNeers find the whole “diagrams as text” thing a bit arcane.
So that means that we needed a more accessible tool for them. The ideal diagram drawing tool for VSHN must have the following requirements:
Cross-platform: Most of us at VSHN use Linux, but a sizable number also use Macs and Windows laptops.
Accessible to non-technical VSHNeers: Not everyone at VSHN is a DevOps engineer.
Simple to use: If possible, using a point-and-click interface; for example, in our Confluence wiki we have enabled the Gliffy extension, which allows non-technical users to create stunning diagrams.
So we started our search. Leaving aside tools like Inkscape, that are too generic, like Asciiflow, that are too limited, or like Dia, that are too platform-specific, it took us a while to find a tool that would fit our requirements. But we found it!
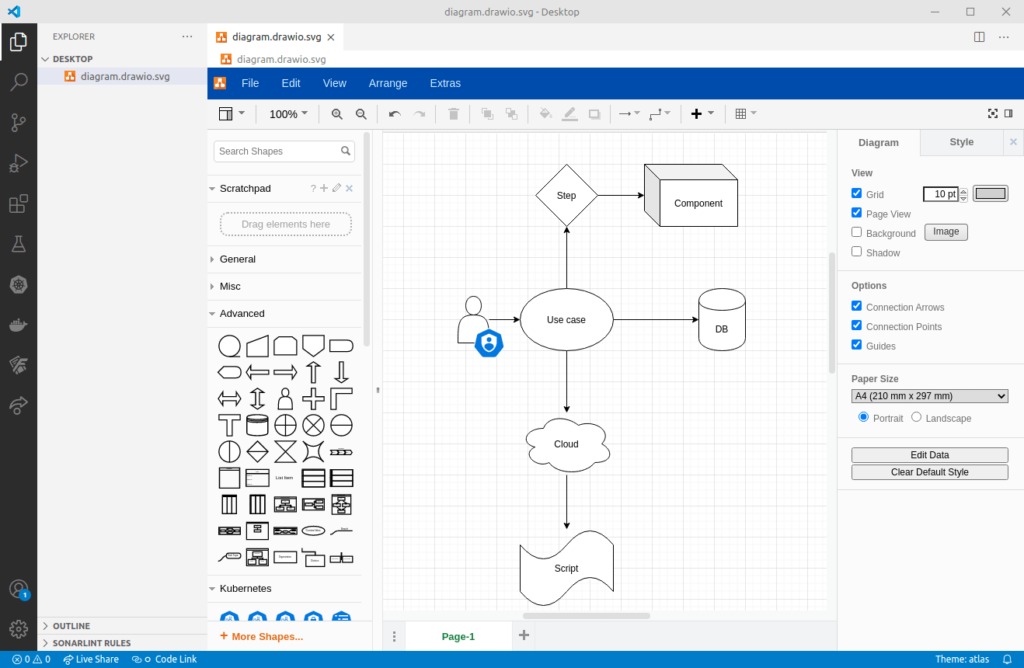
Please welcome Diagrams.net (previously also known as Draw.io). It is a web application geared specifically to the generation of diagrams, very easy to use and ticking all the boxes that we needed.
And even better, there is a Visual Studio Code extension that allows to edit diagrams locally, directly on your laptop, in Linux, Mac and Windows.
How do we integrate this with Antora? Very simple. In the assets/images folder of our documentation components, create your diagrams using the *.drawio.svg extension. These are automatically associated by Visual Studio Code with the extension, and provides a live editor with all the bells and whistles you might expect.
And then, well, just image::diagram.drawio.svg[] in your documents, git commit and push.
This approach is definitely more accessible to non-technical VSHNeers, making it super easy to edit diagrams online, or locally in Visual Studio Code.
About Our ISO 27001 Certification And ISAE 3402 Type 1 Report
11. Nov 2020
One of our core value propositions consists in making sure that our infrastructure responds to the highest levels of security, confidentiality, and availability.
It is with this goal in mind that we passed our first ISO 27001 certification in 2017, and this year we added an ISAE 3402 audit, initially requested by one of our customers in the financial sector.
ISO 27001
ISO 27001 is a worldwide applied standard for the certification of an information security management system (ISMS). Its aim is to protect information based on an analysis of business risks regarding confidentiality, integrity and availability.
The certification is valid for three years. Every year there is a monitoring audit done by the certification authority. This year the three year period for the first certificate ended. In spite of the ongoing worldwide pandemic we were able to renew this certification earlier this year with excellent results.
The audit required for the renewal not only didn’t raise any concerns, but rather praised positively our KPIs for ISMS, our thorough integration of information security into every single step of our operations, and the overall commitment of management to the whole process.
Our certification is valid for the next three years, and you can download it for review.
ISAE 3402
Service providers are recommended to use a recognized auditing company on their own behalf, which annually reports in a standardized form on the functioning of their internal controls.
This is done in order not to have to repeatedly expose its confidential internal processes, procedures and methods.
The most important international standard for companies in the financial sector in Switzerland is ISAE 3402.
The International Standard on Assurance Engagements (ISAE) 3402 is an internationally accepted audit standard issued and maintained by the International Auditing and Assurance Standards Board (IAASB). The ISAE 3402 is divided into two categories: ISAE 3402 Type I only assesses the suitability or design of controls, i.e. the control design and implementation. While the ISAE 3402 Type II additionally also evaluates the effectiveness of the controls during the test period, i.e. their definition and concrete implementation.
The ISAE 3402 Assurance Report examines the definition and implementation of control objectives as well as the existence and effectiveness of controls. The basic prerequisite for a successful audit is a complete and up-to-date documentation of the company organization, the IT organization and ICS-related issues. This includes an assessment of the existence and effectiveness of the internal control system, including the IT organization and IT security.
ISAE 3402 reports provide substantial added value to FINMA regulated firms, which must ensure conformity to circulars regarding outsourcing, such as Rundschreiben 2008/21 and Rundschreiben 2018/3.
On June 2020 our ISAE 3402 Report Type 1 got audited by ERM Solution AG. We are currently planning the establishment of our Type 2 report by January next year. This report ensures and supports the legal audits of our financial customers.
Assessing the Impact of New Docker Pull Rate Limits in APPUiO
3. Nov 2020
Docker Inc., the company behind Docker Hub, has recently announced an enforcement of image pull rate limits for Docker Hub users. This change affects all cloud native installations currently configured to consume container images stored in Docker Hub, one of the most popular image repositories available today. This measure has a direct impact in the deployment of many customer applications currently running on APPUiO Public and Private Clusters.
We are following the situation closely. Following recent announcements, Docker Hub is slowly starting to enforce a pull rate limit of 100 pulls per 6 hours for anonymous (unauthenticated) IP-Addresses, and 200 pulls per 6 hours for authenticated non-paying users. This means that a Kubernetes or OpenShift cluster can only pull 100 images in 6 hours without authentication for all of its users from Docker Hub. During maintenance periods, most of the images of a cluster are pulled at some point, and the reduction of pull rate limits can cause downtime when the images can’t be pulled due to the limit.
This situation should not affect today’s maintenance window. Even though the announced start date of the rate limit was Monday, October 2nd, 2020 the analysis of responses from Docker Hub indicates that the new limits are not yet applied, and will only be enforced during a 3-hour window from 18:00 to 21:00 (CET) tomorrow. Unfortunately at this point we don’t know when the new pull rate limits will be enforced fully.
Also noteworthy, these restrictions do not apply to the internal OpenShift registry included with APPUiO Public or Private, which is completely independent of Docker Hub, nor to Docker users with Pro or Team accounts. Authenticated users with Pro or Team accounts enjoy unlimited data transfer to and from Docker Hub.
VSHN is currently evaluating measures to prevent downtime, and reduce the impact of this situation for our customers. The most appropriate solution at this moment consists in switching to the aforementioned Pro or Team Docker account types. Even simpler, the use of an authenticated user account in a pull secret instead of an anonymous account will double the pull rate limit, and will reduce the risk of downtime considerably. Another possibility consists in migrating images to a different public registry, like Red Hat Quay. Another option is the use of a private registry, such as the OpenShift integrated registry, AWS ECR, GitLab Container Registry, Harbor, or other similar technologies. In particular, AWS has recently announced the future availability (“within weeks”) of a free public registry.
We remain at your service for any enquiry. Contact us if you need more information.
Gabriel Mainberger
Gabriel Mainberger is a DevOps engineer in VSHN.
Latest news
Events
General
Tech
Cloud Native Computing Switzerland Meetup – March 2026 Recap
Migrating OpenShift Container Platform (OCP) 3 to 4: learn about possible migration paths and why you should make the move to the new version of OpenShift.
Recap: what is OpenShift?
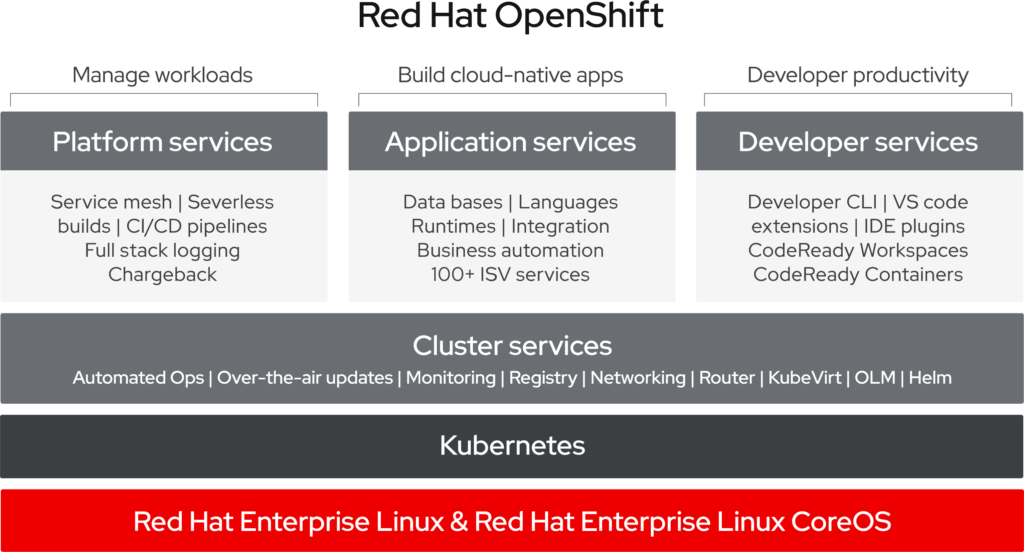
Red Hat OpenShift is a hybrid cloud, enterprise Kubernetes application platform for developers and business applications. OpenShift provides a secure and stable platform for container-based deployments without the need for big IT investments. This means that much needed legacy applications can be used alongside new cloud native and container-based ones. Red Hat OpenShift is a Kubernetes distribution. An extensive article with more details about Kubernetes and how Kubernetes compares to OpenShift can be found here. OpenShift consists of platform, application, and developer services. It is used to manage workloads, build cloud-native apps, and to boost the productivity of developers.
OpenShift 4 was introduced at the Red Hat Summit in May 2019. In this major release, Red Hat redefines Kubernetes for the enterprise through full stack automation. OpenShift 4 includes new technologies and functionality that results in self-managing, flexible, and automated clusters. New key elements of OpenShift 4 include:
Immutable Red Hat Enterprise Linux CoreOS;
Operator framework;
OpenShift service mesh; and
Knative framework.
OpenShift 4 is Kubernetes at its core and in this release, Red Hat has completely re-architected how OpenShift is installed, upgraded and managed, introducing innovations such as Kubernetes Operators. Operators automate life cycle management of containerized applications with Kubernetes, and drives installation and upgrades of OpenShift and all of its services. This includes Kubernetes core services, along with Prometheus, Grafana, Elasticsearch, software-configured networking, storage, registry and other components of the OpenShift Kubernetes platform. OpenShift 4 is an Operator-driven platform that delivers full-stack automation from top to bottom. OpenShift 4 also offers multiple cluster management across multiple clouds, and enables hybrid cloud services with Operators & OperatorHub. OpenShift 4 is designed to deliver a unified experience across hybrid cloud by driving automated installation and updates across Kubernetes deployments everywhere, all powered by Kubernetes Operators. OpenShift 4 is still built on top of Red Hat Enterprise Linux, and delivered in a new immutable form as Red Hat Enterprise Linux CoreOS. OpenShift 4 also brings a number of new developer services and capabilities needed to build cloud-native applications, to deploy them consistently across any supported on-premises, private, or public cloud infrastructure. Red Hat OpenShift 4 is Kubernetes for the Enterprise, designed to power businesses’ digital transformation, and to unite development teams on a single platform.
What are the advantages of migrating to OpenShift 4
OpenShift 3 will only be supported until 2021, so besides the need to migrate to the new version, we also think that OpenShift 4 brings many advantages for both operators and users. The level of maturity of operators leaves little to be desired. For the operation of a cluster, updates are much faster and at the same time, easier to handle and more stable. This also simplifies operations, as operators can react to changes and correct errors if needed. Operators are a new concept also for the operation of applications for users of OpenShift. The switch from Docker to Buildah for container builds now allows to build container images in a more secure way. This is a welcome innovation for all multitenant clusters, such as public platform providers and corporate clusters with multiple users. With the introduction of the OpenShift Service Mesh, developers in particular will gain new insights and new possibilities to visualize, secure and optimize the communication of their applications. OpenShift 4 represents a significant change in the way that OpenShift Container Platform clusters are deployed, managed, and developed upon. OpenShift 4 includes new technologies and functionality, for both developers and cluster administrators. Operators, Serverless, Service Mesh, and Red Hat Enterprise Linux CoreOS (RHCOS), are all new to OpenShift 4. They are redefining what’s possible with the next generation of Kubernetes platforms. This technology shift enables clusters to self-manage functions previously performed by administrators, and empower developers to innovate on a consistent and stable platform that is simple to install and scale. The advantages of OpenShift 4 include:
Operators: implement and automate common Day-1 (installation, configuration, etc) and Day-2 (re-configuration, update, backup, failover, restore, etc.) activities in a piece of software running inside your OpenShift cluster, by integrating natively with Kubernetes concepts and APIs.
Red Hat Serverless: enables an application to consume only the compute resources necessary, scaling up or down automatically depending on usage. This removes the overhead of server provisioning and maintenance from the developer, letting them focus on application development instead.
Red Hat Service Mesh: controls how different parts of an application share data with one another through a built-in dedicated infrastructure layer. This visible infrastructure layer can track different parts of an app and their interactions, to optimize communications and to avoid downtime as it grows.
Red Hat Enterprise Linux CoreOS: combines the ease of over-the-air updates from Container Linux with the Red Hat Enterprise Linux kernel, to deliver a more secure, easily managed container host.
OpenShift’s goal is to help developers to innovate more rapidly, to address the needs of the business quicker. Cloud native application development brings new challenges. As developers adopt microservice architectures, managing the communication between each service, securing those services and getting better service to service traceability to debug issues is an absolute necessity. These are the challenges that the Istio open source project seeks to address. The OpenShift 4 Service Mesh takes Istio and combines it with other key projects, like Jaeger for tracing and Kiali for visualization, to provide better manageability and traceability to microservices deployments. Developers can focus on building the business logic, letting the service mesh manage how each microservice communicates based on policies they define. They can also leverage the tracing and visualization capabilities to debug issues when they occur. Development approaches haven’t stopped evolving, and serverless is yet another way developers are looking to build applications, by leveraging function as a service based offerings. The Serverless model enables scaling down to zero, so as to only consume compute resources when functions execute. This can be an effective way to control operational costs, particularly in the public cloud. FaaS offerings were first pioneered by public cloud providers like AWS, but have the potential to lock your applications into a single cloud environment. This is why Red Hat is working to bring these capabilities to a hybrid cloud environment via Knative. Red Hat is an active member of the Knative open source project, collaborating with the Kubernetes community to drive upstream development that enables hybrid serverless capabilities. Using the Knative framework enabled in OpenShift, users can extend Kubernetes to build, deploy and manage serverless applications, supporting containerized and serverless deployments from a single Kubernetes control plane.
Who is OpenShift 4 for?
Almost a year after the initial release of OpenShift 4, we believe that OpenShift Container Platform 4 is ready for productive workloads. If you are currently running OpenShift 3, you have to evaluate and plan migrating to OpenShift 4. What are your options?
Do you want to run and operate OpenShift yourself?
This way you “keep full control” and you decide on every detail with all the implications
Do you have enough staff with the needed know-how to run OpenShift operations yourself 24/7? This might mean that you have to re-train your staff and also re-engineer all operations tools.
You might need to hire new people or train your existing staff.
External consultants might be needed for specific tasks such as the setup or migration part.
Or do you want to work with a partner who takes care of your OpenShift installation and ensure 24/7 operations?
Work with a hyperscaler like AWS/Azure/Google Cloud etc.:
You are super flexible, you can spin up your own cluster and the additional tools you need and you can do everything yourself “at a fingertip”
But you are also bound to one platform and you have to ensure the actual 24/7 management and operations
Work with a specialized partner like VSHN / APPUiO:
You can be sure that you have the latest OpenShift know-how and enough people who take care of your operations, both on premises or in any cloud of your choice.
A certified, Swiss based Red Hat partner who knows how to run OpenShift even in the most sensitive areas and industries such as banking & finance with a focus on the business-relevant application, not the “generic platform”
You get Managed OpenShift, 24/7 operations, additional Managed Services for a recurring monthly fee, at the end you save time & money so that your people can focus on developing your product and / or services.
At the end, it’s not a question of if, but when to migrate to OpenShift 4.
How to migrate from OpenShift 3 to OpenShift 4
There is no planned update path from OpenShift 3 to 4. Red Hat provides migration tools, however, that can migrate not only the Kubernetes resources, but also the data from persistent volumes, where S3 Storage is used as a cache. The migration tool supports migrations from version 3 to 4 as well as migrations between different OpenShift 4 clusters. According to the website openshift.com, the migration process from OpenShift 3 to 4 can be completed in 5 steps:
Spin up a new cluster running OpenShift 4.
Configure the new OpenShift 4 cluster.
Create a migration plan which includes how to handle data from the applications that are being migrated.
Run migration plan.
Move your DNS or Load-balancer configuration to your new cluster.
To successfully transition from OpenShift Container Platform 3 to OpenShift Container Platform 4, it is important that you review the following information:
Planning your transition: Learn about the differences between OpenShift Container Platform versions 3 and 4. Prior to transitioning, be sure that you have reviewed and prepared for storage, networking, logging, security, and monitoring considerations.
Performing your migration: Learn about and use the tools to perform your migration:
Control Plane Migration Assistance Tool (CPMA): the Control Plane Migration Assistance tool helps you configure the new cluster OpenShift 4 cluster that will be the destination for the applications that are being migrated from your existing OpenShift 3 cluster. This tool reduces the possibility for human error in the configuration process, matching when possible the existing settings in the source cluster. It also allows you to review the resources that will be applied to the new cluster.
Cluster Application Migration Tool (CAM): the Cluster Application Migration tool (CAM) migrates stateful and stateless applications from the source cluster on OpenShift 3 to a destination cluster running the latest OpenShift. It also can migrate applications between OpenShift 4 clusters. It is installed on your destination cluster via an Operator. Through the rich user interface take advantage of the simplified, customizable workflows. Decide which applications to start with and which migration approach best fits each application and your needs.
If you need detailed instructions about your OpenShift migration, head over to this page to learn more about the migration process and how to utilize the migration tooling. And of course, if you need help with your migration, we will be very happy to help you.
VSHN and APPUiO
VSHN is a Red Hat Advanced CCSP partner and we offer Managed OpenShift since 2016 through our brand APPUiO, both in the cloud of your choice or on premises. In 2020, we are operating OpenShift clusters for 350 customers and partners in 16 clouds around the globe. If you want to learn how we helped acrevis Bank in Switzerland with the move and how we operate OpenShift for them, check out our Success Story.
APPUiO OpenShift 4 Fact Sheet
Our APPUiO OpenShift Fact Sheet explains the benefits of OpenShift 4 in an easy to read 2-pager.
Download the Fact Sheet below.
OpenShift 4 Tech Labs
Join our free OpenShift 4 Tech Labs. Need help migrating and operating OpenShift 4? Contact us, we are here to help.
Markus Speth
Marketing, Communications, People
Latest news
Events
General
Tech
Cloud Native Computing Switzerland Meetup – March 2026 Recap
Without further ado, we’re announcing the release 0.2 of the Project Syn tools.
Since the first public release mid-March this year (read more about it in First Pre-Release of Project Syn Tools) we used the tools on a daily basis, in particular for the development of our new product “VSHN Syn Support”. And of course we have incorporated all of that experience in the source code. The main features are now in place, and are getting better and better on a daily basis.
New Features and Improvements
When reading the announcement of a new version, engineers are always interested in new features and improvements. So these are the most important new additions since 0.1:
Everything required for setting up a new cluster (GitOps repository, cluster config file in Tenant configuration, Vault secrets, and more) is now fully automated. One API call to register a new cluster and you’re done.
In parallel to the creation of clusters, we have also automated all steps required to decommission them (Repo deletion, Vault secret cleanup, and more). Just delete it and everything is gone (of course, there are preventive measures in place to not make this an Uh-oh moment).
Commodore got a lot of improvements: for local development, and for developing new components with a comprehensive cookiecutter template.
Document All The Things
Besides implementing new features and fixing bugs we put a lot of effort into the documentation. The main documentation page https://syn.tools/ got a completely new structure and a huge amount of new content. We’re in the process of adding new pages frequently, so make sure to check it out every so often.
Before 0.2 it was hard to get started with Project Syn and to understand what it was all about. To solve that issue we wrote the following introductions:
Our next goal is to document the concepts behind configuration management with Commodore in detail.
Commodore Components on GitHub
An important building block of Project Syn are Commodore Components. Over the past months we’ve written and open sourced more than 10 Commodore Components on GitHub. They offer the flexibility to install and configure Kubernetes system services, adapted to their respective distribution and infrastructure.
These Commodore Components can be found by searching for the “commodore-component” topic on GitHub.
We are writing and refining more and more Components every day. We are going to publish some guidelines about how to write Commodore Components (one specifically for OpenShift 4 Components is already available) and eventually enforce them via CI jobs and policies.
An upcoming Component Writing Tutorial will help beginners to start writing own Components or contribute to existing ones.
The Road to 1.0 and Contributions
What we learnt while working on Project Syn over the last few months gave us a very clear picture of what we want to achieve in version 1.0. The roadmap contains the most important topics:
Documentation! We have to and will put a lot of effort into documentation, be it tutorials, how-to guides, or explanations.
Full Commodore automation to automate and decentralize the cluster catalog compilation process.
Developer experience improvements for simplifying the development of Commodore Components even further.
Engineering of a new tool helping users to launch managed services on any Kubernetes cluster.
Cluster provisioning automation integration, to leverage third party tools for automatically bootstrapping Kubernetes clusters.
This is not all; check the more detailed roadmap on the Project Syn page for more. The GitHub project will grow with issues over the next few weeks.
If you think that this sounds interesting and you would like to contribute, we now have an initial Contribution Guide available and are very open to suggestions and pull requests. Just get in contact with us if you’re interested.
Our Product: VSHN Syn Support
Besides the Open Source project we were also working on defining what added value you can get from VSHN. We call this product “VSHN Syn Support.” If you’re interested in getting commercial support from VSHN for Project Syn on a Managed Kubernetes Cluster based on OpenShift 4 or Rancher, get in touch with us. More information about VSHN Syn Support can be found here.
Tobias Brunner
Tobias Brunner is working since over 20 years in IT and more than 15 years with Internet technology. New technology has to be tried and written about.
Latest news
Events
General
Tech
Cloud Native Computing Switzerland Meetup – March 2026 Recap
This is about how we manage large numbers of ModSecurity WAF deployments, including CRS and custom rules.
ModSecurity CRS Berne Meetup
At VSHN we’re not only 100% committed to Free and Open Source software, we also collaborate actively with the communities of the software we use, deploy and enhance. This June, we had the pleasure to join the OWASP ModSecurity Core Rule Set Berne Meetup group online who had asked us back in November at yet another Meetup to showcase the way we use ModSecurity and the Core Rule Set (CRS).
Tutorial: Backing up Kubernetes Clusters with K8up
23. Jun 2020
One of the most common questions we got from companies moving to Kubernetes has always had to do with backups: how can we ensure that the information in our pods and services can be quickly and safely restored in case of problems? This situation is so common that we VSHN decided to tackle it with our own Kubernetes operator for backups, which we called K8up. Note: This tutorial is available in three versions, each in its own branch of the GitHub repository bundled with this text:
K8up (pronounced “/keɪtæpp/” or simply “ketchup”) is a Kubernetes operator distributed via a Helm chart, compatible with OpenShift and plain Kubernetes. It allows cluster operators to:
Backup all PVCs marked as ReadWriteMany or with a specific annotation.
Perform individual, on-demand backups.
Schedule backups to be executed on a regular basis.
Schedule archivals (for example to AWS Glacier), usually executed in longer intervals.
Perform “Application Aware” backups, containing the output of any tool capable of writing to stdout.
Check the backup repository for its integrity.
Prune old backups from a repository.
Based on top of Restic, it can save backups in Amazon S3 buckets, and Minio (used we’ll see in this tutorial.)
This tutorial will show you how to backup a small Minikube cluster running on your laptop. We are going to deploy Minio, MariaDB and WordPress on this cluster, and create a blog post in our new website. Later we’re going to “deface” it, so that we can safely restore it later. Through this process, you are going to learn more about K8up and its capabilities. Note: All the scripts and YAML files are available in GitHub: github.com/vshn/k8up-tutorial.
2.1 Requirements
This tutorial has been tested in both Linux (Ubuntu 18.04) and macOS (10.15 Catalina.) Please install the following software packages before starting:
Make sure PyYAML 5.1 or later is installed: pip install PyYAML==5.1
k9s to display the contents of our clusters on the terminal.
jq, a lightweight and flexible command-line JSON processor.
3. Tutorial
It consists of six steps to be executed in sequence:
Setting up the cluster.
Creating a blog.
Backing up the blog.
Restoring the contents of the backup.
Scheduling regular backups.
Cleaning up.
Let’s get started!
3.1 Setting up the cluster
Note: The operations of this step can be executed at once using the scripts/1_setup.sh script.
Start your minikube instance with a configuration slightly more powerful than the default one:
minikube start --memory 4096 --disk-size 60g --cpus 4 Note: On some laptops, running Minikube on battery power severely undermines its performance, and pods can take really long to start. Make sure to be plugged in to power before starting this tutorial.
Copy all required secrets and passwords into the cluster:
After finishing all these steps, check that everything is running; the easiest way is to launch k9s and leave it running in its own terminal window, and of course you can use the usual kubectl get pods. Tip: In k9s you can easily delete a pod by going to the “Pods” view (type :, write pods at the prompt and hit Enter), selecting the pod to delete with the arrow keys, and hitting the CTRL+D key shortcut.
The asciinema movie below shows all of these steps in real time.
3.2 Viewing Minio and WordPress on a browser
Note: The operations of this step can be executed at once using the scripts/2_browser.sh script.
Open WordPress in your default browser using the minikube service wordpress command. You should see the WordPress installation wizard appearing on your browser window.
Open Minio in your default browser with the minikube service minio command.
You can login into minio with these credentials: access key minio, secret key minio123.
3.2.1 Setting up the new blog
Follow these instructions in the WordPress installation wizard to create your blog:
Select your language from the list and click the Continue button.
Fill the form to create new blog.
Create a user admin.
Copy the random password shown, or use your own password.
Click the Install WordPress button.
Log in to the WordPress console using the user and password.
Create one or many new blog posts, for example using pictures from Unsplash.
Click “Publish” and see the new blog post on the site.
3.3 Backing up the blog
Note: The operations of this step can be executed at once using the scripts/3_backup.sh script. To trigger a backup, use the command kubectl apply -f k8up/backup.yaml. You can see the job in the “Jobs” section of k9s. Running the logs command on a backup pod brings the following information:
$ kubectl logs backupjob-1564752600-6rcb4
No repository available, initialising...
created restic repository edaea22006 at s3:http://minio:9000/backups
Please note that knowledge of your password is required to access
the repository. Losing your password means that your data is
irrecoverably lost.
Removing locks...
created new cache in /root/.cache/restic
successfully removed locks
Listing all pods with annotation appuio.ch/backupcommand in namespace default
Adding default/mariadb-9588f5d7d-xmbc7 to backuplist
Listing snapshots
snapshots command:
0 Snapshots
backing up via mariadb stdin...
Backup command: /bin/bash, -c, mysqldump -uroot -p"${MARIADB_ROOT_PASSWORD}" --all-databases
done: 0.00%
backup finished! new files: 1 changed files: 0 bytes added: 4184711
Listing snapshots
snapshots command:
1 Snapshots
sending webhook Listing snapshots
snapshots command:
1 Snapshots
backing up...
Starting backup for folder wordpress-pvc
done: 0.00%
backup finished! new files: 1932 changed files: 0 bytes added: 44716176
Listing snapshots
snapshots command:
2 Snapshots
sending webhook Listing snapshots
snapshots command:
2 Snapshots
Removing locks...
successfully removed locks
Listing snapshots
snapshots command:
2 Snapshots
If you look at the Minio browser window, there should be now a set of folders that appeared out of nowhere. That’s your backup in Restic format!
3.3.1 How does K8up work?
K8up runs Restic in the background to perform its job. It will automatically backup the following:
All PVCs in the cluster with the ReadWriteMany attribute.
All PVCs in the cluster with the k8up.syn.tools/backup: "true" annotation.
The PVC definition below shows how to add the required annotation for K8up to do its job.
Just like any other Kubernetes object, K8up uses YAML files to describe every single action: backups, restores, archival, etc. The most important part of the YAML files used by K8up is the backend object:
repoPasswordSecretRef contains the reference to the secret that contains the Restic password. This is used to open, read and write to the backup repository.
s3 specifies the location and credentials of the storage where the Restic backup is located. The only valid option at this moment is an AWS S3 compatible location, such as a Minio server in our case.
3.4 Restoring a backup
Note: The operations of this step can be executed at once using the scripts/4_restore.sh script. Let’s pretend now that an attacker has gained access to your blog: we will remove all blog posts and images from the WordPress installation and empty the trash.
Oh noes! But don’t worry: thanks to K8up you can bring your old blog back in a few minutes. There are many ways to restore Restic backups, for example locally (useful for debugging or inspection) and remotely (on PVCs or S3 buckets, for example.)
3.4.1 Restoring locally
To restore using Restic, set these variables (in a Unix-based system; for Windows, the commands are different):
Note: You can create these variables simply running source scripts/environment.sh. With these variables in your environment, run the command restic snapshots to see the list of backups, and restic restore XXXXX --target ~/restore to trigger a restore, where XXXXX is one of the IDs appearing in the results of the snapshots command.
3.4.2 Restoring the WordPress PVC
K8up is able to restore data directly on specified PVCs. This requires some manual steps.
Using the steps in the previous section, “Restore Locally,” check the ID of the snapshot you would like to restore:
Use the kubectl get pods commands to see when your restore job is done.
Tip: If you use the kubectl get pods --sort-by=.metadata.creationTimestamp command to order the pods in descending age order; at the bottom of the list you will see the restore job pod.
3.4.3 Restoring the MariaDB pod
In the case of the MariaDB pod, we have used a backupcommand annotation. This means that we have to “pipe” the contents of the backup into the mysql command of the pod, so that the information can be restored. Follow these steps to restore the database:
kubectl get pods | grep mariadb | awk '{print $1}'
Copy the backup into the MariaDB pod:
kubectl cp backup.sql MARIADB_POD:/
Get a shell to the MariaDB pod:
kubectl exec -it MARIADB_POD — /bin/bash
Execute the mysql command in the MariaDB pod to restore the database:
mysql -uroot -p"${MARIADB_ROOT_PASSWORD}" < /backup.sql
Now refresh your WordPress browser window and you should see the previous state of the WordPress installation restored, working and looking as expected!
3.5 Scheduling regular backups
Note: The operations of this step can be executed at once using the scripts/5_schedule.sh script. Instead of performing backups manually, you can also set a schedule for backups. This requires specifying the schedule in cron format.
Tip: Use crontab.guru to help you set up complex schedule formats in cron syntax. The schedule can also specify archive and check tasks to be executed regularly.
Run the kubectl apply -f k8up/schedule.yaml command. This will setup an automatic schedule to backup the PVCs every 5 minutes (for minutes that are divisors of 5). Wait for at most 2 minutes, and run the restic snapshots to see more backups piling up in the repository. Tip: Running the watch restic snapshots command will give you a live console with your current snapshots on a terminal window, updated every 2 seconds.
3.6 Cleaning up the cluster
Note: The operations of this step can be executed at once using the scripts/6_stop.sh script. When you are done with this tutorial, just execute the minikube stop command to shut the cluster down. You can also minikube delete it, if you would like to get rid of it completely.
4. Conclusion
We hope that this walkthrough has given you a good overview of K8up and its capabilities. But it can do much more than that! We haven’t talked about the archive, prune, and check commands, or about the backup of any data piped to stdout (called “Application Aware” backups.) You can check these features in the K8up documentation website where they are described in detail. K8up is still a work in progress, but it is already being used in production in many clusters. It is also an open source project, and everybody is welcome to use it freely, and even better, to contribute to it!
Aarno Aukia
Aarno is Co-Founder of VSHN AG and provides technical enthusiasm as a Service as CTO.
Latest news
Events
General
Tech
Cloud Native Computing Switzerland Meetup – March 2026 Recap
We have been working hard since the initial announcement of Project Syn back in November 2019, and are proud to announce version 0.1.0, the first pre-release of a set of Project Syn tools.
Quick reminder about what Project Syn is about:
Project Syn is a pre-integrated set of tools to provision, update, backup, observe and react/alert production applications on Kubernetes and in the cloud. It supports DevOps through full self-service and automation using containers, Kubernetes and GitOps. And best of all: it is Open Source.
Short answer: it enables the management of many Kubernetes clusters, and provides a set of services to the users of those clusters. Project Syn is composed by many tools; some specially developed for the project, some already existing, all Open Source. It’s not only about tooling, it’s also about processes and best practices.
The actual story is a bit longer.
Features of version 0.1.0
To manage a big fleet of Kubernetes clusters, we need an inventory with the following information:
The cloud providers they are running on;
Locations;
Tenants each cluster belongs to;
Kubernetes versions deployed;
Kubernetes flavor / distribution used;
…and a lot more!
This is what the Project Syn tool Lieutenant (written in Go) gives us: an inventory application to register clusters, to assign them to a tenant and to store inventory data. It consists of a REST API (based on the OpenAPI 3 specification) and a Kubernetes Operator, to store data directly in the underlying Kubernetes cluster (in CRDs) and to act on events.
Knowing about clusters is just one part. Another important element is to continuously deploy and monitor system applications (like K8up, Prometheus, …) on Project Syn enabled Kubernetes clusters. This is all done with the GitOps pattern, managed by Argo CD, which is deployed to every cluster. Thanks to Argo CD we can make sure that the applications deployed to the cluster are exactly configured as specified in the corresponding Git repository, and that they are running just fine.
Each Project Syn enabled Kubernetes Cluster has its own so-called Catalog Git Repository. This contains a set of YAML files specifically crafted for each cluster, containing the system tools to operate the cluster, and to give access to well configured self-service tooling to the user of the cluster. The generation of these YAML files is the responsibility of the Project Syn tool Commodore (written in Python). Commodore is based upon the Open Source tool Kapitan by leveraging inventory data from Lieutenant. After gathering all needed data about a cluster from the inventory, Commodore can fetch all defined components, parameterize them with configuration data from a hierarchical GIT data structure and generate the final YAML files, ready to be applied by Argo CD to the Kubernetes Cluster. The Lieutenant API also knows where the catalog Git repository is located, and Commodore is therefore able to automatically push the catalog to the matching Git repository.
Secrets are never stored in GitOps repositories. They are instead stored securely in Hashicorp Vault, and only retrieved during the “apply” phase, directly on the destination Kubernetes Cluster. This process is supported by the Kapitan secret management feature and by Commodore, who prepares the secret references during the catalog generation. Argo CD calls kapitan secrets --reveal during the manifest apply phase, which then actually connects to Vault to retrieve the secrets and stores them in the Kubernetes Cluster, ready to be consumed by the application.
The management of all these Git repositories is the responsibility of the Lieutenant Operator (written in Go, based on Red Hat’s Operator SDK). It is able to manage remote Git repositories (GitLab, GitHub, Bitbucket, etc) and prepare them for Commodore and Argo CD, for example by configuring an SSH deploy key.
The Project Syn tool Steward (written in Go) has the responsibility of enabling Project Syn in a Kubernetes Cluster, communicating with the Lieutenant API, to perform the initial bootstrapping of Argo CD. This bootstrapping includes basic maintenance tasks: should Argo CD be removed from the cluster inadvertently, Steward will automatically reinstall it. An SSH deploy key is generated during bootstrapping and transmitted back to the API. With this procedure it is possible to bootstrap the whole GitOps workflow without any manual interaction.
Analogies with Puppet
For those familiar with Puppet, there are some similarities with the design of Project Syn:
Puppet Server: Commodore and Kapitan to generate the catalog, matching the facts from the cluster.
Puppet DB: Lieutenant acting as inventory / facts registry.
Puppet Agent: Steward and Argo CD on the cluster. Steward to communicate with the API and Argo CD to apply the catalog.
Puppet Modules: Commodore Components, bringing modularity into Kubernetes application deployment.
Many of these concepts are documented in the Project Syn documentation pages, specifically the Syn Design Documents, documenting all the design decisions (even though they are still in “work-in-progress” stages).
What are the next steps for Project Syn?
This is really just the beginning! There are a lot of plans and ideas for the future evolution of Project Syn. We have crafted an initial roadmap, and we published it as part of the official Project Syn documentation.
This initial pre-release is just the tip of the iceberg. Under the surface there is a lot more brewing, to be released as soon as possible. To reiterate: It’s not only about tools, but also about concepts and processes, which also means a lot of documentation will emerge over the next months.
One of the focus of this initial pre-release was to lay the foundation for future development. It has a strong focus on the operations side. Future milestones will broaden the focus to include more and more self-service possibilities for the user, including tight integration of Crossplane for easy and fully automated cloud service provisioning.
We at VSHN are now starting to use Project Syn for an initial set of managed Kubernetes clusters, and will continue to develop the concept, tools and processes while we learn about more use cases and with the real-life experience we gather.
How can I contribute?
Project Syn is a young project and is making the first initial steps in the open world. Many things are just getting started, just like the documentation and the contribution guidelines. Testing and giving feedback through GitHub issues is certainly a great way to start contributing. And of course, if you are looking for a Managed Kubernetes or Managed OpenShift cluster, get in touch with us with the form at the bottom of this page!
This summer Red Hat released OpenShift 4. At first glance, the new major version is a continuous development of OpenShift 3 with relatively manageable changes for the user. But if you look under the hood, you will quickly see a completely revised OpenShift. The blogpost of Benjamin Affolter on the APPUiO blog examines the changes of OpenShift 4 and describes them in detail.
With the following article we would like to take a look behind the scenes of our Managed OpenShift offering and explain what we have to do to be able to offer our Managed Service with OpenShift 4.
Advantages of OpenShift 4
Red Hat promises the following improvements with version 4 of OpenShift:
New Installer
Fully automated operations, maintenance and configuration using Operators
Integration of Operator Hub
Current versions of Kubernetes
To fully understand the benefits and also the implications, we need to take a step back and take a look at OpenShift 3.
Managed OpenShift 3 – what’s included?
For better understanding, you can find a short overview of what our Managed OpenShift 3 service includes so far (not exhaustive):
Architecture engineering and setup of the OpenShift Cluster on almost any infrastructure (Cloud, On-Premise)
Monitoring of all cluster-relevant components to ensure operation
Regular backup of the cluster configuration incl. ensuring the integrity of the backup
Weekly maintenance of all systems, application of software patches and configuration improvements on all clusters
Automation of all work with Ansible (configuration, maintenance, updates, upgrades, installation, sanity checks and much more)
Integration into our central customer portal for an overview of the status of the cluster and other functions
Extensive dashboards in Grafana
Close cooperation with Red Hat Support for solving bugs in OpenShift, among others
Maintenance of various internal lab clusters to test changes to productive clusters
Provision of persistent storage using Gluster
Management and maintenance of the operating system Red Hat Enterprise Linux for the OpenShift masters and nodes
Training of system engineers to run OpenShift
All these listed points have been developed since the very first version of OpenShift 3 and are developed daily by our VSHNeers.
Status Quo VSHN Systems
From a technical point of view, our current system landscape looks something like this (brief overview):
Puppet for the local operating system management of all VMs (system configuration, maintenance of the defined state) and inventory of all systems and services.
Icinga2 for monitoring all operating system parameters within the VM, but also very extensive checks of all OpenShift cluster components. Icinga2 is configured and orchestrated by Puppet.
Ansible for installation and configuration of OpenShift, for regular maintenance and for much more
BURP for consistent data backups incl. cluster configuration, configured and orchestrated by Puppet
Gluster for persistent storage, managed by Ansible
Over the years, countless Ansible Playbooks have accumulated and all our knowledge and automation has gone into these Playbooks. We maintain our own fork from the official OpenShift Ansible Repository to be able to react quickly to any bugs. We regularly keep this fork up to date with upstream. Puppet not only takes care of the local operating system configuration, but also controls many important components such as the monitoring and backup system. In addition, the PuppetDB provides us with an up-to-date inventory of all systems managed by us, including detailed version information of the installed components. This is also integrated in our customer portal and is used for automatic billing of our managed services. The monitoring plugins we developed for Icinga2 cover almost every problem we have discovered with OpenShift and notify us if there is anything wrong with the cluster or one of its components. Our system documentation and OpenShift operation guide include several dozen Wiki articles.
Managed OpenShift 4 – what is there to do for VSHN?
From a system engineering point of view, OpenShift 4 is a completely new product. For VSHN this means that we have to completely redevelop a large part of the above points. A few examples:
The installation and configuration of OpenShift 4 is no longer based on Ansible, but on a separate installer (which uses Terraform in the background) and the configuration is done by In-Cluster Operators. Our Ansible Playbooks for OpenShift 3 can for the most part no longer be used for OpenShift 4.
The operating system is no longer Red Hat Enterprise Linux, but Red Hat CoreOS, which behaves completely different. Puppet cannot be used anymore and as described above we have to find other ways to inventory, orchestrate and bill the surrounding systems.
Our monitoring plugins for Icinga2 are no longer compatible with OpenShift 4 and the monitoring concept with Icinga2 no longer fits the platform’s revised architecture. For us this means a new development of our monitoring concept.
The backup system BURP can no longer be used in its current form, a new backup system has to be developed.
This is not an exhaustive list, there are many more details in our system landscape that need to be adapted.
The path to production
For us as a Managed Service Provider, stability and scalability are the most important points which are non-negotiable. This means that we have to take the necessary time to learn all the changes and peculiarities for a productive operation of OpenShift 4. The adaptation and development of the necessary tools and processes for the operation of dozens of clusters requires a lot of time and engineering effort. However, we started early and have already gained some experience with OpenShift 4. The experience gives us great confidence that OpenShift 4 can deliver on its promises of greatly simplified operation. The current version OpenShift 4.1 also has some limitations. Here is a small selection of what we noticed:
No support for proxies
AWS and VMware are the only supported IaaS providers with OpenShift 4.1 (current version at the time of this article)
Installation on unsupported and non-cloud platforms is very fragile
Container storage only via CSI
Many IaaS providers are not yet ready for OpenShift 4, but we are in close contact with our IaaS & Cloud partners like cloudscale.ch, Exoscale, Swisscom and AWS, to ensure compatibility so that we can continue to offer a smooth operation with OpenShift 4. OpenShift 4.1 reminds us partly of the early days of OpenShift 3, when it took some time until OpenShift 3 was ready for production. But we are very confident that the open issues can be solved and we are looking forward to the 4th generation of Red Hat OpenShift!
With APPUiO.ch we have created a Swiss Container Platform based on Red Hat OpenShift on which we offer Managed Services as a PaaS solution (Platform-as-a-Service) on any infrastructure: public, dedicated, private and on-premises. Based on proven Open Source concepts like Docker and Kubernetes you develop, operate and scale an application according to your needs. With APPUiO, your applications can run on public clouds as well as in-house. The platform was originally developed in 2015 by the two IT specialists Puzzle ITC and VSHN AG for the professionalization of their internal IT. Today, APPUiO is used productively by many customers and is supported by a strong community.
How can we help?
With our experience in operating OpenShift clusters around the world, we offer managed OpenShift clusters on almost any public, private or on-premise cloud. We are happy to help with evaluation, integration and operation and support with our many years of Kubernetes experience. Contact us, subscribe to our newsletter and follow us on Twitter (@vshn_ch and @APPUiO) to keep up with the latest news and have a look at our Services. We look forward to your feedback!
Tobias Brunner
Tobias Brunner is working since over 20 years in IT and more than 15 years with Internet technology. New technology has to be tried and written about.
Latest news
Events
General
Tech
Cloud Native Computing Switzerland Meetup – March 2026 Recap
This post comes late after my EuroPython 2019 talk on “Modern Continuous Delivery” in Basel. But there is no need to worry: Advice on writing software that outlasts hypes on modern computing has no hurry to appear on stage.
What a great time!
Deployment automation, cloud platforms, containerization, short iterations to develop and release software—we’ve progressed a lot. And finally it’s official: Kubernetes and OpenShift are the established platforms to help us do scaling and zero downtime deployments with just a few hundred lines of YAML. It’s a great time. Can we finally put all our eggs into one basket? Identify the cloud platform that fits our needs, and jump on it? That could well backfire: Vendor lock-in is the new waterfall, it slows you down. In future you’ll want to jump over to the next better platform, in a matter of minutes. Not months. So, how do we do that? What’s the right approach?
Version control and automation (CI/CD, “pipelines”)
Cloud-native applications (resilient apps that scale)
Nothing new. You’ve heard this before.
Vendor lock-in is the new waterfall
Software development has become complex. So complex that there are numerous services popping up almost daily that help us getting things done. Most notably, these are application delivery platforms nowadays (Amazon AWS, Microsoft Azure, Google Cloud — just to name a few). When we use offerings across several such providers, which is becoming increasingly popular, we speak of multi-cloud dependencies.
While all offerings are choices they typically entail a lock-in, because we don’t have standards and tooling yet that allow us to effortlessly switch from one solution provider to another. And when there are reasons to make a switch, lock-ins make it inherently difficult to move fast. This is a problem.
What can we do about vendor lock-in?
Software development is not about “using <technology>” or “using <platform>”. As engineers we must think in terms of “problem to solve” (requirements) and applying proper development practices (engineering). If we rely on platforms to solve problems for us we’re doing it wrong. Engineers must learn to follow principles of good software design, to write and maintain “clean code”.
Responsibility layers
One of those principles you learn as an engineer is to maintain boundaries between systems. In a modern software development project you’ll see four of such “layers of responsibility” that define boundaries:
Application
Development
Deployment
Automation
Think in terms of technologies and tools, or services and environments you use in each to understand why we have those.
The application layer is like how you did software development 15 years ago. It’s just concerned with getting things running locally. Add the 12factor app methodology and you get an application that is prepared for potential target environments.
The development layer is concerned with supporting the development in the application layer. Developer tooling that gets the project running with a single command, a test infrastructure setup and QA tooling, which should also be easy to handle.
The deployment layer reuses that part of the development layer that made the developer deploy the application locally, for development. It also houses configuration files used only in productive target environments and deployment configuration that describes the entire productive setup.
The automation layer is only concerned about automating the steps you would otherwise perform manually to deploy your application.
Clean separation and interfaces
Now we have layers. What do we gain? Note how the layers use an interface to talk to the next layer above. This allows us to address them separately. In other words,
When you want to use a different CI service (e.g. switch from Bitbucket Pipelines to GitLab CI) you only refactor the implementation in the automation layer (i.e. the CI configuration).
When you want to change your container orchestration (e.g. switch from OpenShift to Kubernetes) you only refactor your implementation of the deployment layer (e.g. use Kustomize instead of OpenShift templates and Ingress instead of Routes, etc.). You may also have to change some of the deployment tooling in the automation layer as a consequence (e.g. use kubectl instead of oc), but it’s all cleanly separated.
This is the power of separation of concerns. Also note that for this to work well you need to make your interfaces simple and stable.
For development use a task runner to turn your common tasks into single commands or simple one-liners (in JavaScript you may use gulp, in Ruby rake, in Python tox).
Don’t design for target environments in your application layer! Design with features in mind and only combine them to environment configurations in your deployment layer.
Stick to standard procedures and established tooling (instead of proprietary or self-invented solutions) for the technologies you use. This is typically more stable as an interface, will save collaborators from learning how to work with your setup and make it unnecessary to add extensive instructions to the README.
The more you invest in this flexibility and clean separation the easier your task will be when the day comes to make a change.
Working code samples to your rescue
What is better than starting to investigate late and working on refactoring under time pressure? Knowing your possibilities and turning to working code samples when you need them! That’s where the Painless Continuous Delivery Cookiecutter comes into play. It’s a project template generator covering many of the most popular combinations of public service offerings you may be working with. At VSHN AG we’re working on extending it—for your independence. Try it out, let us know if you find it useful, and contribute if you feel like! For the start you may want to take a look at one of the generated setups on GitLab, the live demo for the EuroPython talk. Enjoy!
EuroPython 2019: Modern Continuous Delivery for Python Developers
deploy step by step our operators.
For this SDK supported workflow, we provide:
a) a description of the generated Operator structure (there is one for each specific workflow);
b) a link to our example(s)of operator(s) based on such Operator structure (there is one for each specific workflow) and logic.
c) descriptions on how to add (e.g., 3rd party) resources, different from the Core Kubernetes resource types, to your Operator
d) a description of the main pros and cons of using suchOperator structure (there is one for each specific workflow) andlogic.
a) Description of the generated Operator structure (there is one for each specific workflow)
As follows the structure of a generated GO operator:
File/Folders
Purpose
cmd
Contains manager/main.go which is the main program of the operator. This instantiates a new manager which registers all custom resource definitions under pkg/apis/... and starts all controllers under pkg/controllers/... .
pkg/apis
Contains the directory tree that defines the APIs of the Custom Resource Definitions (CRD). Users are expected to edit the pkg/apis/<group>/<version>/<kind>_types.go files to define the API for each resource type and import these packages in their controllers to watch for these resource types.
pkg/controller
This pkg contains the controller implementations. Users are expected to edit the pkg/controller/<kind>/<kind>_controller.go to define the controller’s reconcile logic for handling a resource type of the specified kind.
build
Contains the Dockerfile and build scripts used to build the operator.
deploy
Contains various YAML manifests for registering CRDs, setting up RBAC, and deploying the operator as a Deployment.
Gopkg.toml Gopkg.lock
The Go Dep manifests that describe the external dependencies of this operator.
vendor
The golang vendor folder that contains the local copies of the external dependencies that satisfy the imports of this project. Go Dep manages the vendor directly.
Operator scope
A namespace-scoped operator (the default) watches and manages resources in a single namespace, whereas a cluster-scoped operator watches and manages resources cluster-wide. Namespace-scoped operators are preferred because of their flexibility. They enable decoupled upgrades, namespace isolation for failures and monitoring, and differing API definitions. However, there are use cases where a cluster-scoped operator may make sense. For example, the cert-manager operator is often deployed with cluster-scoped permissions and watches so that it can manage issuing certificates for an entire cluster.
b) Exampleof operator(s) based on such Operator structure (there is one for each specific workflow) and logic.
c) How to add 3rd Party Resources (i.e., different from the Core Kubernetes resource types) to your Operator
The operators manager supports the Core Kubernetes resource types as found in the client-go scheme (“register.go“) package and will also register the schemes of all custom resource types defined in your project under pkg/apis
To add a 3rd party resource to an operator, you must add it to the managers scheme. By creating an AddToSchememethod or reusing one you can easily add a resource to your scheme. An example shows that you define a function and then use the runtime package to create a SchemeBuilder.
Register with the managers scheme
Call the AddToScheme() function for your 3rd party resource and pass it the managers scheme via mgr.GetScheme().
Example:
“After adding new import paths to your operator project, run dep ensure in the root of your project directory to fulfill these dependencies”.
$ dep ensure
d) A description of the main pros and cons of using this Operator structure (there is one for each specific workflow) and logic;
PROS (+) AND CONS (-):
(+) it is easy to use and create a simple operator
The main program for the operator cmd/manager/main.go initializes and runs the manager. The manager will automatically register the scheme for all custom resources defined under pkg/apis/... and run all controllers under pkg/controller/....
The manager can restrict the namespace that all controllers will watch for resources:
(+) enough clear way to add 3rd Party Resources (i.e., different from the Core Kubernetes resource types) to your Operator
(-) it is still unstable/changing the APIs and the future versions of it could be not supported (we are observing this evolution and update the blog post accordingly)
To make the operator working, we had to open some issues in Github, that was closed and classified as a bug):
(-) The workflow to create the GO operators appear a bit more complex/unclear (steps in red) that the one generated with Ansible and Helm (which require fewer steps):
Create a new operator project using the SDK Command Line Interface (CLI)
Define new resource APIs by adding Custom Resource Definitions (CRD)
Define controllers to watch and reconcile resources
Write the reconciling logic for your controller using the SDK and controller-runtime APIs
Use the SDK CLI to build and generate the operator deployment manifests
(This blog post is the transcription of the presentation given at the CNC Switzerland meetup, May 9th 2019. Slides are available at the end of this page and impressions of the meetup can be found here.)
Serverless is one of those hot topics that, as many others in our industry, looks a bit like a good old idea recycled and brought back to fashion. Yet Serverless (or “Function as a Service”) looks like a natural evolution to a movement that started more than a decade ago, when Heroku and Google App Engine came under the spotlight. As says Martin Fowler himself, Serverless and FaaS can be defined as follows:
FaaS is about running backend code without managing your own server systems or your own long-lived server applications.
At VSHN we have been interested in the subject for years now, and even worked in a FaaS project for a customer two years ago.
But now that Kubernetes and Knative are emerging as the true “Golden Standards” of hosted cloud operations, we see the emergence of FaaS solutions running directly on top of them. And developers have been fast creating lots of solutions that somehow appear to occupy the same space. How do they compare? Which one to choose?
To answer these questions, we are going to give a brief description of the following frameworks, outlining some of their characteristics and relative strengths:
The order of the frameworks is not trivial; they are roughly ordered following their “level of abstraction” on top of Docker and Kubernetes. For each of these projects, we are going to provide the following information:
OpenFaaS is the project with the most stars (14’000) on Github of all those in this article. It is mostly written in Go, featuring around 100 contributors, and the latest available version at the time of this writing is 0.13.0 (April 4th, 2019).
It is an independent project, funded through donations (Patreon, OpenCollective, and PayPal.)
From a developer experience perspective, it is a project quite complex to setup and use. It is based on Docker, which means that functions are actually packaged as containers, to be pushed to a repository, and to be built using a local Docker installation in the developer workstation. OpenFaaS manages the Dockerfile for the developers automatically, though.
OpenFaas has a “template store” with several available programming languages. It also provides developers with a command-line utility, called faas-cli, itself talking to a REST API documented using Swagger. Finally, there is a Serverless Framework plugin for those who need it.
The following asciicast shows a very simple interaction with OpenFaas. First we create a Python function, which we customize a bit, and then we deploy and call it from the command line; both directly and also using curl:
OpenFaaS functions can be called through the following triggers:
Finally, developers can use the following programming languages with OpenFaaS:
C#, F# (.NET Core)
Go
JavaScript (Node.js)
Java (JVM)
PHP 7
Python / Python 3
Ruby
2. Fn Project
The Fn Project has been started and is currently funded by Oracle, who uses a fork to power its own Oracle Functions product.
Just like OpenFaaS, it is hosted in Github and written in Go. The project has around 4000 stars and 80 contributors, and the latest version at the time of this writing is 0.3.703 (May 6th, 2019).
From a technical point of view, Fn can use any Docker container as a function, and it can run anywhere: in public, private, and hybrid clouds.
Fn has two major concepts: – Functions (defined in YAML) – Applications: groups of functions, which can be deployed all at once.
For developers, it offers a command-line tool called fn and a Serverless Framework plugin.
Fn functions can be triggered with HTTP calls, and can be developed using the following languages:
Go
JavaScript (Node.js)
Java (JVM)
Python
Ruby
C# (community supported)
The Fn marketing material further states that it “supports all languages”.
3. Fission
Fission is an open source, Kubernetes-native Serverless Framework. It allows functions to be deployed and executed instantly, mapping them to HTTP requests. Its Github project is mostly written in Go, features 4300 stars and around 80 contributors at the time of this writing. Its latest available version is 1.2.0 (May 3rd, 2019). It was started and is currently maintained by Platform9.
Fission does not need Dockerfiles or Docker registries; it is based on the notion of environments. Functions are injected into those environments, which are a pool of containers with language runtimes, where functions are loaded and launched on demand.
Fission keeps in memory a set of images containing the runtimes where the functions will be run, injecting them and running them immediately when invoked. In this sense, it is similar to how AWS Lambda works.
For developers, it features a command line tool (fission) and a Serverless Framework plugin. They do not need to have a local Docker environment to build their functions into.
The following asciicast shows the basic operations required to create, deploy and call a function:
Currently, Fission supports following types of triggers:
HTTP
Time
Message Queue
Kubernetes Watch
Only the following programming languages can be used to create functions in Fission; the project is quite young and the list will probably grow in the future:
Go
Python
JavaScript (Node.js)
Java (JVM)
In our tests, using minikube as a support, Fission appears easy to use, but at the same time very fragile (in spite of what its version number might suggest.) Removing and re-creating environments and functions led to many problems, and the project is too young to have more than 5 (unanswered) questions on Stack Overflow. In short, a promising but yet rather immature product.
4. OpenWhisk
OpenWhisk is the behemoth in the room. This open source project was created by IBM and is currently managed by the Apache Foundation. This project is the most “corporate” ones of those described in this blog post. It is written in Scala, it features around 4000 stars in Github and has around 150 contributors. The latest available version at the time of this writing is 0.9.0 (October 31st, 2018.)
This framework has the following features:
Very “corporate” in design and functionality;
Secure by default;
Forked by Adobe and other big corporations;
For developers, it features a command-line tool (wsk) and a Serverless Framework plugin.
OpenWhisk functions can be triggered by the following mechanisms:
Message Queues
Databases
Document Stores
Website or Web Apps
Service APIs
IoT Frameworks…
OpenWhisk function can be created using the following programming languages:
The installation on minikube was the most complex and difficult of all the frameworks considered in this document. The tools have changed a lot in the last two years and resources online might be outdated. But in spite of those factors, this framework stands out by the quantity, breadth, and depth of the documentation, as well as by the number of integration and supported languages.
5. Kubeless
Kubeless is a promising framework created and maintained by Bitnami. It is an open source project on Github written in Go, with around 4600 stars and 80 contributors. At the time of this writing, its latest version is 1.0.3 (March 14th, 2019.)
In our tests it was the one offering the best developer experience. Very simple to install and use, it offers a command-line tool (kubeless) that is very similar to the AWS Lambda CLI. This is no coincidence, as the whole aim of the project is to provide an experience very close to that of AWS Lambda, Azure Functions or Google Cloud Functions.
For DevOps teams, Kubeless provides Prometheus monitoring of functions calls and latency, and a Serverless Framework plugin.
The following asciicast shows the basic interaction to create, deploy, and test a function using Kubeless:
Kubeless functions can be triggered through the following mechanisms:
HTTP
Cronjob
PubSub mechanisms
Kafka
NATS messaging
Data stream events
AWS Kinesis
These functions can be developed using the following languages and runtimes:
All frameworks herewith considered, Kubeless offered the most flawless experience of all. The documentation was solid and easy to follow, and there are plenty of online resources to guide developers into building applications using this platform.
6. TriggerMesh
TriggerMesh is the newest entry in the world of FaaS, and it will represent a major shift in the way serverless applications are deployed and executed. Founded ex-Kubeless engineers, it builds upon Kubernetes & Knative, providing features yet unseen in the serverless arena.
TriggerMesh functions can be triggered through cross-cloud triggers from AWS to functions on Knative:
Code Commit
Cognito
DynamoDB
Kinesis
S3
SNS
SQS
…
TriggerMesh has announced the following programming languages as options:
Go
JavaScript (Node.js)
Python
Ruby
Together with VSHN, TriggerMesh released the TriggerMesh Operator for OpenShift 4.0. OKD 4.0 was recently announced by Red Hat to bring additional automation to Kubernetes applications. The operator allows OpenShift users to install the TriggerMesh management platform and benefit from its integration with Knative, to power serverless workloads across multiple clouds.. TriggerMesh also allows CI/CD of serverless functions, as well as access to multi-cloud event sources, like Azure and AWS.
Comparison
The following chart summarizes some of the ideas of this article, and has been adapted from the “Examining the FaaS on K8S Market” article on the Cisco Blog.
Local Docker
Image Repo
Base Image
OpenFaaS
Required
Required
Required
Fn Project
Required
Required
Required
Fission
None
None
Required
OpenWhisk
None
None
None
Kubeless
None
None
None
Popularity
The following tweet provides interesting information about the current state of the FaaS-on-Kubernetes market:
32% of those using or planning to use a serverless platform have a Kubernetes-based installable platform in their plans, with Kubeless often being cited alongside other options. https://t.co/RYEwShkrLbpic.twitter.com/lqWWyrQu8B
I hope this summary will be useful to you! Having tested all of these options, here at VSHN we will be focusing our efforts in the TriggerMesh platform, which will provide a much more solid developer experience and an unprecedented level of flexibility. We believe that this is the next generation of serverless platforms and we cannot wait to bring its power to our customers.
TriggerMesh will be launching their TriggerMesh Cloud service in the near future which will allow users to host serverless functions and consume events from many cloud sources. To join the TriggerMesh Early Adopters program and get access for free serverless hosting for a limited time only please visit cloud.triggermesh.io.
Sources
The author used the following articles, documents, and books for inspiration and guidance:
Here we discuss in a general setting about Operators, Operator Framework, and Operators SDK.
Then we will discuss about the Operators SDK emerging popularity in GitHub, and in general about the “Operator SDK workflow” adopted for generating and handling operators.
Here we discuss about the three available alternative workflows to generate Operators provided by the last versions of Operator SDK APIs.
We also discuss pros and cons of using the various operators workflows.
IN THIS BLOG POST WE WILL TALK ABOUT: Section 3 – Examples of Supported Kubernetes Operator SDK workflows
Here we provide examples of the three available alternative workflows to generate Operators provided by the Operator SDK APIs.
We specifically focus on Go operators, as they are in our opinion the more stable available APIs.
Section 3 – Examples of Supported Kubernetes Operator SDK workflows
We will refer to: 1) Operator: Go operator 2) Operator: Ansible operator [coming soon] 3) Operator: Helm operator [coming soon]
For each of these SDK supported workflows, we provide: a) a description of the generated Operator structure (there is one for each specific workflow); b)a link to our example(s) of operator(s) based on such Operator structure (there is one for each specific workflow) and logic. c) descriptions on how to add (e.g., 3rd Party) Resources, different from the Core Kubernetes resource types, to your Operator d) a description of the main pros and cons of using suchOperator structures (there is one for each specific workflow) and logic.
in a general setting about Operators, Operator Framework, and Operators SDK.
the Operators SDK emerging popularity on GitHub, and in general about the “Operator SDK workflow” adopted for generating and handling operators.
IN THIS BLOG POST WE WILL TALK ABOUT: Section 2 – Supported Kubernetes Operator SDK workflows
Here we discuss about the three available alternative workflows to generate Operators provided by the last versions of Operator SDK APIs.
We also discuss the pros and cons of using the various operators’ workflows.
Section 2 – Supported Operator SDK workflows
As discussed before, on GitHub, the Operator SDK is a very active project, with over 10 releases produced in less than a year. This means that the Operator SDK is a toolkit that is continuing evolving over the time (e.g., its code, structure, and logic is changing). In particular, as reported in the main Github page of the operator SDK, the libraries and tools are labeled with “Project Status: pre-alpha”, and thus are “expected breaking changes to the API in the upcoming releases”. The project started in April 2018 and we started monitoring it intensively from September 2018. We found out that the SDK provides three different workflows to develop operators based on Go, Ansible, or Helm. These versions of the Operators SDK emerged between 2018 and 2019. Specifically, the first version of the operator was based on Go, and only from December 2018 it was provided a version based on Ansible. Finally, in the beginning of 2019 (January), the operator workflow based on Helm was also released. Thus, the SDK provides a workflow to develop operators based on Go, Ansible, or Helm. The following workflow is for a new Go operator:
Create a new operator project using the SDK Command Line Interface (CLI)
Define new resource APIs by adding Custom Resource Definitions (CRD)
Define Controllers to watch and reconcile resources
Write the reconciling logic for your Controller using the SDK and controller-runtime APIs
Use the SDK CLI to build and generate the operator deployment manifests
The following workflow is for a new Ansible operator:
Create a new operator project using the SDK Command Line Interface (CLI)
Write the reconciling logic for your object using Ansible playbooks and roles
Use the SDK CLI to build and generate the operator deployment manifests
Optionally add additional CRD’s using the SDK CLI and repeat steps 2 and 3
The following workflow is for a new Helm operator:
Create a new operator project using the SDK Command Line Interface (CLI)
Create a new (or add your existing) Helm chart for use by the operator’s reconciling logic
Use the SDK CLI to build and generate the operator deployment manifests
Optionally add additional CRD’s using the SDK CLI and repeat steps 2 and 3
Guidelines: Command Line Interface:To learn more about the SDK CLI, see the SDK CLI Reference, or run operator-sdk [command] -h. For a guide on Reconcilers, Clients, and interacting with resource Events, see the Client API doc. As it is possible to see from the following figure, there is not much difference among the various operator workflows. However, the workflow that has reached more maturity and gives more control over the operator behavior is the one based on Go:
Here we discuss in a general setting about Operators, Operator Framework, and Operators SDK.
Then we will discuss about the Operators SDK emerging popularity in GitHub, and in general about the “Operator SDK workflow” adopted for generating and handling operators.
Section 1 – Kubernetes Operators, Operator Framework, and Operators SDK
a) Operators are Kubernetes applications A Kubernetes application is an application that is both deployed on Kubernetes and managed using the Kubernetes APIs and kubectl tooling. To be able to make the most of Kubernetes, you need a set of cohesive APIs to extend in order to service and manage your applications that run on Kubernetes. You can think of Operators as the “runtime that manages this type of application on Kubernetes“. Thus, an Operator is a method of packaging, deploying and managing a Kubernetes application. Conceptually, an Operator takes human operational knowledge and encodes it into software that is more easily packaged and shared with consumers. We can think of an Operator as an extension of the software vendor’s engineering team that watches over your Kubernetes environment and uses its current state to make decisions in milliseconds. Operators follow a [maturity model] from basic to having specific logic for an application. We’ve seen in the last years that Operators’ capabilities differ in sophistication depending on how much intelligence has been added into the implementation logic of the Operator itself. We’ve also learned that the creation of an Operator typically starts by automating an application’s installation and self-service provisioning capabilities, and then evolves to take on more complex automation, this depending on the specific use case. As result, advanced operators are, nowadays, designed to handle upgrades seamlessly, react to failures automatically, and not take shortcuts, like skipping a software backup process to save time. b) Operator Framework Operators are Kubernetes native applications that facilitate the management of complex stateful applications on top of Kubernetes, however writing such operators can be very difficult because of challenges such as using (i) low level APIs and (ii) a lack of modularity which leads to duplication, inconsistencies, and unexpected behaviors. To address such issue, several tools are now being launched (e.g., the Operator Framework, Kooper, Metacontroller, etc.) as results of years of work and experience of the Red Hat, Kubernetes, and CoreOS open source communities in building Operators. Specifically, Red Hat and the Kubernetes open source community shared the Operator Framework — an open source toolkit designed to manage operators in a more effective, automated, and scalable way. The Operator Framework is an open source toolkit composed by several low-level APIs. We believe that the new Operator Framework represents the next big step for Kubernetes by using a baseline of leading practices to help lower the application development barrier on Kubernetes. The project delivers a software development kit (SDK) and the ability to manage app installs and updates by using the lifecycle management mechanism, while enabling administrators to exercise operator capabilities on any Kubernetes cluster. The Operator Framework includes:
Operator SDK: Enables developers to build Operators based on their expertise without requiring knowledge of Kubernetes API complexities.
Operator Lifecycle Management: Oversees installation, updates, and management of the lifecycle of all of the Operators (and their associated services) running across a Kubernetes cluster. Once built, Operators need to be deployed on a Kubernetes cluster. The Operator Lifecycle Manager is the backplane that facilitates management of operators on a Kubernetes cluster. With it, administrators can control what Operators are available in what namespaces and who can interact with running Operators. They can also manage the overall lifecycle of Operators and their resources, such as triggering updates to both an Operator and its resources.
Operator Metering (joining in the coming months): Enables usage reporting for Operators that provide specialized services. In a future version, the Operator Framework will also include the ability to meter application usage – a Kubernetes first, which provides extensions for central IT teams to budget and for software vendors providing commercial software. Operator Metering is designed to tie into the cluster’s CPU and memory reporting, as well as calculate IaaS cost and customized metrics like licensing.
Simple, stateless applications can leverage the Lifecycle Management features of the Operator Framework without writing any code by using a generic Operator (for example, the Helm Operator). However, complex and stateful applications are where an Operator can shine. The cloud-like capabilities that are encoded into the Operator code can provide an advanced user experience, automating such features as updates, backups and scaling. In the next subsection we discuss about the Operators SDK emerging popularity in GitHub, and in general about the “Operator SDK workflow” adopted for generating and handling operators. c) Operators SDK popularity The Operator-SDK is a toolkit, recently built on top of the Operator Framework, that provides the tools to build, test and packageOperators. Initially, the SDK facilitated the marriage of an application’s business logic (for example, how to scale, upgrade, or backup) with the Kubernetes API to execute those operations. However, over time, the SDK is evolving to allow engineers to make applications smarter and have the user experience of cloud services. As consequence, leading practices and code patterns that are shared across Operators are included in the SDK to help prevent reinventing the wheel. From a developer perspective, the entry point is the Operator SDK, originating from CoreOS, which is offered as part of the Operator Framework that is, according to its self-description, “an open source toolkit to manage Kubernetes native applications, called Operators, in an effective, automated, and scalable way”. The SDK specifically targets Go developersand applications, and even if support for other programming languages (e.g., Java, C, etc.) is currently lacking, future plans for their integration are already in place. In GitHub, the Operator SDK is becoming a very active project, which already gained a high visibility/popularity with:
over 200 developers that forked its contributions on GitHub, most of them playing/extending some simple examples of operators;
However, even if the project is becoming with the time more popular, its project Status is still “pre-alpha“, which means that “are expected breaking changes to the API in the upcoming releases“. Thus, the Operator SDK toolkit requires still a bit more of maturity to be used in wider practical working scenarios. As researchers, we believe that this software development kit (SDK) will be widely adopted in future, as it will support the developers during the management of app installs and updates by using the lifecycle management mechanism, while enabling administrators to exercise operator capabilities on any Kubernetes cluster (see the following Figure, it highlights the overall view of envisioned Operator SDK support).
As follow we talk about the Operators SDK General Workflow. d) Operators SDK General Workflow The Operator-SDK is a toolkit that provides the tools to build, test and packageOperators, as shown in the following Figure.
Specifically, the following specific workflow is provided by the toolkit for supporting the writing, building, testing and packaging of a new Go operator:
Create a new operator project using the SDK Command Line Interface (CLI)
Define new resource APIs by adding Custom Resource Definitions (CRD)
Define Controllers to watch and reconcile resources
Write the reconciling logic for your Controller using the SDK and controller-runtime APIs
Use the SDK CLI to build and generate the operator deployment manifests
In this context, the Operator SDK uses for its workflow the controller-runtime library, which makes the writing of operators easier by providing:
High level APIs and abstractions to write the operational logic more intuitively.
Tools for scaffolding and code generation to bootstrap a new project fast.
Extensions to cover common operator use cases.
A simple example to create and deploy a simple operator with the SDK toolkit is providedinthe official operator SDK GitHub repository: https://github.com/operator-framework/operator-sdk The resulting automatically generated GO operator will present the following reference Structure:
File/Folders
Purpose
cmd
Contains manager/main.go which is the main program of the operator. This instantiates a new manager which registers all custom resource definitions under pkg/apis/... and starts all controllers under pkg/controllers/... .
pkg/apis
Contains the directory tree that defines the APIs of the Custom Resource Definitions (CRD).
pkg/controller
This pkg contains the controller implementations.
build
Contains the Dockerfile and build scripts used to build the operator.
deploy
Contains various YAML manifests for registering CRDs, setting up RBAC, and deploying the operator as a Deployment.
The Go Dep manifests that describe the external dependencies of this operator.
vendor
The golang vendor folder that contains the local copies of the external dependencies that satisfy the imports of this project. Go Dep manages the vendor directly.
In the next blog post we will talk about the Operators SDK current status, e.g., available versions and workflows.