Kubernetes OpenShift Tech

Building a Modern Load Balancer and NAT gateway with Fedora bootable containers


18. Juni 2026

In my team, we have a space called “innovation week” where each engineer gets a week to work on a cool idea twice a year. From our internal documentation:

Innovation week is a space for engineers to work on a cool idea that they’ve had but which may not directly contribute to the team’s products or processes. Engineers are free to work on something that’s related to an existing tool or to invest this time to learn a new technology or tool.

I got my first hands-on experience with RHEL 10 image mode at the Red Hat Summit Zurich in January 2026. Since then, I’ve been kicking around the idea to build a modern highly available (HA) load balancer (LB) and NAT gateway appliance based on RHEL image mode (or rather the technology underpinning RHEL image mode: bootable containers).

This idea is a clear fit for innovation week as it ticks all the boxes: it’s a cool idea; it’s not immediately contributing to our products, but related to something we run in production; and it’s a learning opportunity for new tools. However, ultimately, I decided on this project for my innovation week of H1 2026 because I was eager to get more hands-on experience with bootable containers.

In the rest of this blog post, we’ll take a closer look at the design and the various components (both off-the-shelf and custom) that make up the proof-of-concept (PoC) implementation of this idea. Additionally, I’ll cover my learnings from a longer period of hands-on work with bootable containers.

If you’re not familiar with bootable containers yet, I recommend reading Fedora bootc’s “What is a Bootable Container?” and optionally also Fedora bootc’s “Getting Started with Bootable Containers”.

Architecture and Design

The PoC design consists of two main parts:

  1. A bootable container that contains all the software and generic config that’s required to set up a pair of VMs that act as a highly available (HA) load balancer and NAT gateway for a Kubernetes cluster running in a private network.
  2. A service on each VM that fetches all cluster-specific configuration from the cluster in front of which it is deployed. The most dynamic cluster-specific configuration are the backend node IPs for the Kubernetes API and the ingress controller. However, the controller also fetches other configurations from the cluster such as the specific floating IPs to use, SSH public keys, and credentials to manage cloud provider floating IP attachments to the active replica.

I discussed this design, along with a few alternatives, with other VSHNeers over the last few months, but we quickly came to the conclusion that the design outlined above is well suited to our primary use case: a load balancer and NAT gateway appliance for OpenShift clusters deployed in private networks on cloud infrastructure that doesn’t offer suitable managed LB and NAT gateway products.

In particular, we liked that this design allows us to leverage our existing rich tool set for managing Kubernetes clusters (Project Syn) to deploy the load balancer and NAT gateway configuration through the same pipeline as the cluster configuration.

Component choices

For building the bootable container base image, I considered RHEL 10 image mode, the Fedora bootc base images, and the Universal Blue base images. I ended up going with the Fedora 44 bootc base image, since that image strikes a nice balance between minimal and familiar, without introducing additional complexities such as managing RHEL entitlements for building the bootable container.

Initially, I had planned to use Ignition to apply custom config on VM first boot. However, after realizing that Ignition requires a bunch of auxiliary tooling and scripts that are missing from the Fedora bootc base image, I ended up using cloud-init instead.

For the actual load balancing and NAT gateway functionality, I mostly stuck to what we’re running in production: HAProxy for load balancing API and ingress traffic, Keepalived for managing internal VIP attachment with Floaty for cloud provider floating IP attachment, and conntrackd for egress TCP connection state synchronization between the two LB VMs.

For traffic routing, which is implemented using iptables on our production LBs, I decided to try out firewalld. This decision turned out to be quite well-suited to a declarative configuration approach, and I was able to set up fairly solid firewall and routing policies for the PoC with only a handful of firewalld config files.

For network interface management, I leveraged NetworkManager, which is Fedora’s default choice for network interface management. This was an easy choice, since I have plenty of experience with it from managing OpenShift clusters.

Finally, for building the service that fetches the cluster-specific config from Kubernetes, I used kubebuilder to build a custom Kubernetes operator in Go (with the slight twist that the operator’s controller-manager will run outside the cluster). Again, this is familiar technology: we’ve written a few Kubernetes operators already, most recently Espejote (I highly recommend the Espejote blog post if you haven’t read it already).

Building the custom bootable container

I spent the first day or so familiarizing myself with the process of building a custom bootable container outside a carefully curated lab environment. The first breakthrough was my discovery of the Universal Blue image-template repository on GitHub: that repository provides a nice experience for building custom bootable containers out of the box, including a fairly comprehensive set of build commands encoded in a Justfile (just is a modern take on make).

However, I quickly realized that my current local environment (Ubuntu 24.04 LTS) isn’t the ideal platform for some bootable containers workflows. In particular, I ended up using a Fedora Atomic VM to run the bootc-image-builder which allows building a bootable VM image for various platforms from a bootable container. For the PoC, I used bootc-image-builder to generate a qcow2 image that I could boot in libvirt/QEMU.

As already noted above, the second big takeaway from building my own bootable container was that the Ignition first boot experience of Fedora/RHEL CoreOS requires quite a bit more than just installing the ignition package. If you’re curious, feel free to check out how Fedora CoreOS builds its Ignition first boot experience with Dracut. In the spirit of iterating quickly, I ended up picking cloud-init as the tool for applying first boot configuration instead.

You can find the source code I used to build the fedora-bootc-loadbalancer bootable container on GitHub at simu/fedora-bootc-loadbalancer. Notably, this repository currently lacks any CI that regularly builds the container and associated qcow2 base image. For the PoC, I was doing all the container builds locally.

Testing the custom bootable container

While one of the advantages of bootable containers is that you can just run them in podman to test changes, I did most of the testing locally in libvirt/QEMU. The main reason for testing in libvirt was that I didn’t fancy spending a bunch of time trying to replicate a VM with multiple network interfaces when running the bootable container in podman.

There are two main approaches for creating VMs from a bootable container image: you can either boot the VM from any bootc-enabled ISO and use bootc switch to pivot the VM to your custom bootable container, or you can build an ISO or importable disk image of your bootable container with bootc-image-builder.

I used bootc-image-builder to generate a qcow2 image of the bootable container and created VMs from that image. I chose this approach, since provisioning the LB VMs from a custom base image is my preferred option for a potential future production setup. Additionally, once I started relying on the custom Kubernetes controller to render initial cluster-specific configurations during first boot, creating VMs from a custom base image which includes the controller binary was much simpler.

For the PoC, I used our OpenShift Lab cluster’s integrated container registry to store the bootable container. This, in combination with deploying an authentication config for bootc via cloud-init, allowed me to update the VMs with bootc upgrade and also enabled bootc switch to change the deployed image tag. Being able to fetch the latest bootable container from the registry allowed me to test changes to the bootable container relatively quickly even without the rapid iteration that’s enabled by running the bootable container in podman locally.

Note that while I used a private registry for the PoC, the bootable container doesn’t contain any secrets, and an eventual production-ready version would host the bootable container on a public registry. All required secrets are cluster-specific and should be injected at first boot via cloud-init or Ignition or updated through the Kubernetes API once the VM is operational to avoid having to build a separate bootable container for each cluster.

In addition to testing new versions via bootc upgrade, I also regularly built a new qcow2 base image from the latest version of the bootable container. Doing so allowed me to refine and improve the first boot process by creating new VMs based on the latest version of the bootable container.

Building the bootc-loadbalancer-controller-manager

Building and testing the Kubernetes operator that fetches the cluster-specific config from the Kubernetes API and renders appropriate configurations for the various services on the VMs was quite straight forward: I did a lot of the initial prototyping and testing against a local Kind cluster which enabled very quick iteration.

Once the controller was able to render the essential service configurations (HAProxy front and back ends, Keepalived config for the private VIPs, Floaty config for the public VIPs, and conntrackd config) based on the custom resource, I started to integrate the controller in the bootable container.

For the PoC, the integration of the controller into the bootable container build process was quite primitive: I simply copied the compiled Go binary into the repository that I used to build the bootable container and the container build process copied it to /usr/bin/bootc-loadbalancer-controller-manager in the container. Additionally, I added a very simple systemd service which runs the controller to the bootable container.

For the PoC, I side-stepped Kubernetes authentication for the controller: early testing used the Kind cluster’s admin kubeconfig injected into the LB VM through cloud-init. For the integration testing towards the end of the week, I used the service account and RBAC that’s generated by kubebuilder and a manually created long-lived service account token.

In the future, we’d probably want to build a more dynamic authentication mechanism in the controller, possibly using Kubernetes‘ TokenRequest API.

Towards the end of the week, I extended the controller with a mechanism that reloads (or restarts) services on the LB VMs when their configuration is updated. This is implemented by hashing all configurations and tracking the currently deployed hashes for each LB VM in the custom resource’s status field. For a production-ready implementation, we’d probably want a secondary loop which triggers a reconciliation every time it sees one of the managed configuration files get changed on disk.

You can find the code for the Kubernetes controller on GitHub at simu/bootc-load-balancer-controller. Also note that the published version of the bootable container source code at simu/fedora-bootc-loadbalancer clones the controller GitHub repository and compiles the controller binary for each container build instead of relying on a manual copy.

SELinux adventures

Naturally, no blog post about building a custom system on Fedora is complete without some SELinux adventures.

After integrating the Kubernetes controller into the bootable container, I started testing the various service configurations. The initial tests were done on a single VM and with some creative integrations, such as configuring the API HAProxy backend on the libvirt VM to point to the Kind cluster on the host. During the initial testing I quickly found that the Keepalived configuration (which was copied almost verbatim from the working production LBs) didn’t work as expected: SELinux was saying “no” to Keepalived setting up the VRRP notification FIFO and Floaty reading from the same FIFO.

To my pleasant surprise, working with SELinux is quite ergonomic in 2026 (shout out to Computing for Geeks‘ SELinux Survival Guide for Fedora which provides a fairly comprehensive overview of modern SELinux tooling).

First, I verified that SELinux was the root cause for Keepalived VRRP notifications not working correctly by temporarily switching to SELinux permissive mode with setenforce 0. After that, I refreshed my memory on how to work with SELinux, and installed the audit and policycoreutils-python-utils packages in my bootable container, since those aren’t part of the Fedora bootc base image.

At that point, I was able to extract the SELinux audit log entries in a nice format (including suggestions for remediation) with sealert. I then used the command line suggested by sealert, using ausearch and audit2allow to turn the log entries into a custom policy. Once the custom policy allowed Keepalived and Floaty to operate normally, I extracted the plain text policy definition and included a step to compile and install the custom policy in the bootable container build script.

After including the custom policy in the bootable container, VMs provisioned from (or updated to) the latest bootable container image automatically used the custom policy and there was no need to manually adjust SELinux anymore for fresh VMs.

After getting Keepalived and Floaty to work, I also extended the bootable container build script with some semanage port commands to label additional ports as http_port_t. This change allowed HAProxy to bind to all the configured front end ports, and to open connections to all the configured back ends.

Extending the controller to work without a Kubernetes API

While testing the controller on the LB VM, it quickly became clear that we needed a “bootstrap” rendering mode which works without a Kubernetes API. In this bootstrap mode, the controller renders initial configurations from a local YAML file which contains the custom resource and referenced cloud provider credentials secret.

After refactoring the controller’s reconcile logic to make it easier to call when there’s no working Kubernetes API, and introducing some extra command line arguments, the controller gained a “render-from-file” mode. The PoC uses this mode in cloud-init’s runcmd to generate initial configurations during first boot of each VM.

Configuring the network interfaces on the LB VMs

At this point, I had also implemented support for rendering custom NetworkManager .nmconnection configuration files in the controller. This enabled me to disable cloud-init’s network rendering completely and instead use the controller to configure the various network interfaces on each LB:

  • the public interface where client ingress traffic arrives and on which egress traffic is routed to the internet.
  • the private cluster network interface on which the LBs manage the default gateway IP and load balance the Kubernetes API.
  • a dummy interface on which all the cloud provider floating IPs are assigned so that loop back traffic on those IPs works as expected.

In order to generate these NetworkManager configurations, the controller must know which of the VM’s network interfaces are attached to the public internet and the cluster’s private network.

By default, the controller selects the interface that has the VM’s default route as the public interface. However, optionally, the public interface name can be specified as a command line argument. Additionally, the cluster network CIDR is a mandatory command line argument for the controller. The controller determines the private cluster network interface by searching for a network interface that’s assigned an IP in the cluster network CIDR.

The controller needs the interface names to read details about each interface from Linux. However, the controller then extracts the interfaces‘ MAC addresses and uses those in the .nmconnection configuration files as stable identifiers for each interface. This approach ensures that the on-disk NetworkManager configuration doesn’t depend on the actual interface names (which may change in some circumstances in cloud provider environments).

At this point, the VMs were almost fully functional as load balancers (notably the services proxied by HAProxy weren’t yet reachable from outside the VM), but didn’t yet act as NAT gateways.

Configuring the firewall

While researching how to operate firewalld, I found the official firewalld blog post Policy Sets: A Home Router in four commands, which describes how a VM running firewalld can be turned into a functional simple router with only four commands.

After some testing, I started with firewalld’s gateway policy set as the base to define a custom firewalld configuration for the LB VMs. The final firewalld configuration extends the gateway policy to allow the LB VMs to act as NAT gateways/routers and exposes all the services proxied by HAProxy to external clients.

For the PoC implementation, the bootable container build script applies the following cluster-independent firewalld configurations:

  • It enables the gateway-lan-to-HOST, gateway-lan-to-world and gateway-world-to-host policies (which are part of the firewalld gateway policy set).
  • It adds a custom firewalld service definition for the OpenShift machine-config-server (TCP port 22623) in /usr/lib/firewalld/services.
  • It customizes the firewalld internal zone definition to allow traffic from the cluster network to the services exposed by HAProxy (Kubernetes API, machine-config-server, and ingress controller)

Additionally, the Kubernetes controller applies the following cluster-specific firewalld configurations:

  • It deploys a custom definition for the external zone which allows access to the services exposed by HAProxy (Kubernetes API and ingress controller) and blocks SSH access on the public floating IPs.
  • It adds the LB’s public interface to the external zone (via NetworkManager .nmconnection file)
  • It adds the LB’s private cluster network interface to the internal zone (via NetworkManager .nmconnection file)
  • It deploys a custom SNAT rule to use a floating IP as the source IP for traffic that’s forwarded from the cluster network to the public interface. This rule is deployed using firewalld’s direct mode, since the high-level firewalld configuration doesn’t currently allow configuring custom SNAT rules.

We translate the egress traffic source IP to a floating IP to ensure a failover of the internal gateway IP between the NAT gateway VMs doesn’t change the source IP of egress traffic, which would break established TCP connections to external servers. Keepalived and Floaty ensure that the internal default gateway VIP and the egress source floating IP are attached to the active LB replica. Finally, conntrackd ensures that egress TCP connection state is synchronized between the two LB replicas. All together, these three configurations provide transparent failover for TCP egress traffic.

End-to-end validation of the PoC

Initially, I had planned to set up a temporary OpenShift cluster for the end-to-end validation of the PoC.

However, I was running out of time, so I decided to do the end-to-end validation with a Talos Linux cluster running in a private libvirt network and a pair of VMs acting as LBs and NAT gateways for the cluster. Also, to avoid having to find real public IP addresses to use as floating IPs, I allocated fake cloud provider floating IPs from RFC-6890 TEST-NET-2 throughout the project.

The overall configuration of the end-to-end validation was set up as follows:

  • I allocated floating IPs for the API (198.51.100.100), the ingress controller (198.51.100.80) and the egress traffic (198.51.100.253) from TEST-NET-2.
  • I set up two libvirt networks:
    • a regular libvirt “NAT” network (192.168.122.0/24). This network acted as the LBs‘ public network (host interface virbr0).
    • a libvirt “isolated” network (192.168.100.0/24). This network acted as the cluster’s private network (host interface virbr1).
  • The two LB VMs were each configured with a network interface in both of those libvirt networks.
    • Keepalived on the LB VMs managed 192.168.100.1 as the default gateway IP for the libvirt isolated network.
  • The Talos Linux VMs were configured with a single network interface in the isolated network (192.168.100.0/24) and received the default gateway IP via DHCP.
  • On the host machine, traffic from 198.51.100.253 which was received on virbr0 was masqueraded to the host’s primary IP. This established outbound connectivity for VMs in the isolated network.

Setting up this validation environment was not without its own challenges: I had to hack the libvirt dnsmasq config for the isolated network in order to distribute the default gateway IP managed by the LB VMs over DHCP. Additionally, I ended up building a very simple mock floating IP API which allowed the LB VMs to dynamically configure static next hop routes on the host. To use that API, I adapted the Keepalived example VRRP notification bash script to call the host’s mock API instead of using Floaty to handle the Keepalived VRRP notifications. Since this script is essentially a replacement for Floaty, the associated moving parts in the bootable container are called fake-floaty.

After a few iterations and some last-minute additions in the Kubernetes controller to generate HAProxy back ends suitable for Talos rather than OpenShift, I was able to bootstrap the Talos cluster with 198.51.100.100 as the Kubernetes API IP. Once the Talos cluster was bootstrapped, I also successfully validated the dynamic functionality of the PoC, watching the HAProxy configurations on the LBs get updated and HAProxy reloaded instantly when Talos nodes joined the cluster.

Conclusion and outlook

I learned a lot throughout the week. In particular, I gained a much deeper understanding of bootable containers and firewalld.

If you’re interested in digging into the implementation, you can find all the code on GitHub: the custom bootable container is built from simu/fedora-bootc-loadbalancer and the Kubernetes controller is built from simu/bootc-load-balancer-controller.

Overall, I believe the PoC showed promise. However, quite a bit of work is still needed to bring the implementation up to production quality. Currently, the happy path mostly works in a local environment, but I wasn’t able to verify the PoC on a real cloud provider due to time constraints and there are various failure paths where the controller hard crashes. Additionally, there are still a number of open questions, in particular in regard to the OpenShift bootstrap process. Further, some optional features which are available on our production LBs (such as the ability to configure HAProxy to expose node port services) aren’t implemented yet.

Finally, while there are currently no concrete plans to move forward with this project in the short term, the results we were able to show after a week of work on the PoC implementation are very promising. To conclude, we’ll definitely keep the bootable container approach in mind for any future products.

Simon Gerber

Simon Gerber ist ein DevOps-Ingenieur bei VSHN.
Kontaktiere uns

Unser Expertenteam steht für dich bereit. Im Notfall auch 24/7.

Kontakt
Kubernetes Tech

Writing a Kubernetes Cluster Autoscaler Provider with externalgrpc

27. Mai 2026

Teaching Cluster Autoscaler to speak cloudscale.ch without forking the autoscaler or waiting for an upstream provider integration.

Introduction

What do you do when Kubernetes Cluster Autoscaler supports the scaling logic you need, but not the cloud provider you run on?

That was the problem behind this experiment. I wanted Cluster Autoscaler to work on cloudscale.ch. There was no upstream provider for it, and I did not want to fork the autoscaler or carry an in-tree provider forever.

The answer was externalgrpc: a cloud provider integration mode that lets Cluster Autoscaler keep its core decision logic while delegating cloud-specific actions to a separate gRPC service.

This post walks through how Cluster Autoscaler makes scaling decisions, what the provider contract looks like, how externalgrpc fits into the architecture, and the practical gotchas I ran into while building an autoscaler provider for cloudscale.ch.

The autoscaler knows when, not how

The first important mental model is this:

Cluster Autoscaler knows when the cluster should scale, but it does not inherently know how to create or delete machines.

The core autoscaler logic decides things like:

  • Are there pending Pods that cannot be scheduled anywhere?
  • Would those Pods fit on a node from a configured node group?
  • Has a node been idle long enough that its Pods could be moved elsewhere?
  • Which node group should be increased or decreased?

What it does not know is how to create a VM, which image to use, how to pass bootstrap data, how the node joins the cluster, or how to delete the machine again.

That part is delegated to a cloud provider plugin.

For large providers, there are already in-tree implementations. But if your provider is not on the list, you need another strategy.

What happens every 10 seconds

By default, Cluster Autoscaler runs a reconciliation loop roughly every 10 seconds. In each loop, it asks a set of questions:

  1. Are there unschedulable Pods?
  2. Would those Pods fit on a node from a configured node group?
  3. If yes, call NodeGroupIncreaseSize(group, delta).
  4. Are there nodes that have been idle for long enough?
  5. Can their Pods be rescheduled elsewhere?
  6. If yes, call NodeGroupDeleteNodes(group, nodes).

The provider does not make these decisions. The provider only receives the result of the decision, for example: “increase this node group by three nodes.”

That separation is useful. It means a provider implementation can stay relatively small. The hard Kubernetes scheduling logic remains in Cluster Autoscaler.

The simulator is the scheduler

Cluster Autoscaler does not reimplement Kubernetes scheduling from scratch. It imports the Kubernetes scheduler framework and uses the same kinds of filter logic the scheduler uses.

That includes scheduling constraints such as:

  • node resource fit
  • node affinity
  • taints and tolerations
  • topology spread constraints
  • inter-pod affinity
  • volume binding
  • node ports
  • volume limits

The autoscaler runs these checks against an in-memory snapshot of the cluster. For scale-down, it can simulate removing candidate nodes and see whether their Pods would fit elsewhere. For scale-up, it can simulate whether pending Pods would fit on a hypothetical node from a node group.

That is where one of the most important provider methods comes in: NodeGroupTemplateNodeInfo.

Node groups, flavours, and choosing what to scale

If the cloud provider supports multiple VM types, sizes, or flavours, the provider usually exposes those as separate node groups. For example, one node group might represent small general-purpose workers, another might represent larger memory-optimized workers, and another might represent nodes with different labels or taints.

Cluster Autoscaler then runs the simulation against the configured node groups. If more than one group could fit the pending Pods, the configured expander decides which group wins. Depending on configuration, that can be random, most-pods, least-waste, price, priority, or another supported strategy.

This gives you a useful amount of flexibility, but it is still not Karpenter. Cluster Autoscaler chooses from node groups that already exist as configured abstractions. Karpenter has a more dynamic provisioning model and can reason more directly about instance types, constraints, and provisioning choices.

So the mental model is:

  • Cluster Autoscaler: choose between predefined node groups
  • Karpenter: more dynamic node provisioning based on workload requirements and available instance types

For an externalgrpc provider, this means the provider should model each relevant cloudscale.ch flavour as a node group, return accurate template node information for each one, and let the autoscaler’s simulator and expander decide which group should grow.

Why externalgrpc?

If your cloud provider is not supported upstream, there are three realistic options:

ApproachWhat it meansTrade-off
Upstream in-tree providerAdd your provider to kubernetes/autoscalerHigh review and maintenance burden, tied to upstream release cycles
Fork Cluster AutoscalerMaintain your own autoscaler buildMaximum control, but you own the fork forever
externalgrpcRun a standalone provider service over gRPCSeparate release cycle, language-agnostic, small provider surface

For cloudscale.ch, externalgrpc was the pragmatic option.

It avoids the need to become an upstream autoscaler maintainer. It avoids carrying a fork. And because the provider is just a gRPC service, it can be implemented in any language. In this case, I used Go.

At the time of writing, it also aligns well with where the autoscaler project appears to be heading. The ongoing SIG Autoscaling refactor proposal points toward splitting provider implementations out of the main autoscaler repository. In that future, providers would either consume the autoscaler core as a library or communicate out of process via externalgrpc.

For an independent provider implementation, that makes externalgrpc a good escape hatch.

Architecture

At a high level, the architecture looks like this:

Pending Pods
    |
    v
Cluster Autoscaler
    |
    | gRPC over mTLS
    v
autoscaler-cloudscale
    |
    | cloudscale.ch REST API
    v
cloudscale.ch VMs
    |
    v
VM boots, kubelet joins, CCM stamps providerID

The Cluster Autoscaler remains the brain. It watches the Kubernetes cluster, notices pending Pods, runs scheduling simulations, and decides whether a node group should grow or shrink.

The external provider is the hands. It receives requests from Cluster Autoscaler and performs cloud-specific actions:

  • list cloudscale.ch servers
  • create VMs
  • tag VMs
  • delete VMs
  • map Kubernetes nodes back to cloudscale.ch servers

The provider also needs configuration for node groups, for example:

nodeGroups:
  - name: worker
    flavor: flex-8-2
    min: 1
    max: 5
    image: custom:talos-1.13.2
    userData: @talos
    tag: k8s-autoscaler-group

In my setup, the VM bootstrap is handled through Talos Linux machine configuration passed as user data. The VM boots, Talos configures the node, kubelet joins the cluster, and the cloud controller manager stamps the node with a provider ID.

That provider ID is critical. Without it, the autoscaler cannot reliably connect a Kubernetes Node back to the corresponding cloud VM. Scale-down depends on this mapping.

The provider contract: six important RPCs

The externalgrpc proto contains more methods, but the core provider behavior is built around a small set of RPCs:

RPCPurpose
RefreshReconcile provider state with the cloud
NodeGroupsReturn configured node groups
NodeGroupForNodeMap a Kubernetes node to a node group
NodeGroupTemplateNodeInfoDescribe what a new node would look like
NodeGroupIncreaseSizeCreate new servers for a node group
NodeGroupDeleteNodesDelete specific servers

The remaining methods are either bookkeeping or can be implemented as explicit Unimplemented stubs, as long as the service satisfies the proto contract.

The most important design decision is to make the cloud provider the source of truth. Do not trust only local state. VMs can be manually deleted, failed creates can leave partial state, and API calls can fail halfway through.

In practice, Refresh lists servers from the cloud provider API, filtered by tags, and rebuilds the provider’s internal view.

Conceptually:

servers, err := api.Servers.List(ctx, cloudscale.WithTagFilter(tags))
if err != nil {
    return err
}

byUUID := make(map[string]*cloudscale.Server, len(servers))
for i := range servers {
    byUUID[servers[i].UUID] = &servers[i]
}

cache.Store(byUUID)

Tags are what scope the provider to the right cluster and node group. In this implementation, group membership is represented with a tag such as:

k8s-autoscaler-group=<name>

TemplateNodeInfo: modelling future nodes

When scaling from zero, there may be no real worker node in the cluster. So how can Cluster Autoscaler know whether a pending Pod would fit on a node that does not exist yet?

The provider has to describe what a future node would look like.

NodeGroupTemplateNodeInfo returns a synthetic Kubernetes Node object. This object tells the autoscaler things like:

  • CPU capacity
  • memory capacity
  • disk-related properties
  • labels
  • taints
  • allocatable resources
  • maximum Pod count
  • special devices or constraints

This is where the provider has to “lie” to the autoscaler, but only in a very specific sense. The node is not real yet. It is a placeholder used for scheduling simulation.

As an analogy, this is conceptually similar to the idea of virtual nodes: an object that represents capacity that is not currently a normal worker node. This is only an analogy, not Virtual Kubelet and not a real virtual-node implementation. Cluster Autoscaler does not schedule Pods onto this synthetic node. It uses the template to answer the question: “If I created a node like this, would these pending Pods fit?”

In other words, the template node is not runtime capacity. It is simulated future capacity.

One easy mistake is to expose the raw VM flavor as the node capacity without accounting for kubelet reservations, system reservations, or eviction thresholds. A VM with 8 GiB of memory does not have 8 GiB of allocatable memory for workload Pods.

Another easy mistake is forgetting to set ResourcePods. If the template node says it can run zero Pods, the autoscaler will correctly conclude that no workload can ever fit there.

That bug is wonderfully frustrating: everything looks wired up, the autoscaler runs, but nothing scales.

Creating nodes: target size first, VM later

When Cluster Autoscaler decides to increase a node group, it calls NodeGroupIncreaseSize with a delta.

The provider then needs to:

  1. Increase the target size in its own node group state.
  2. Create the requested number of VMs.
  3. Tag them correctly.
  4. Pass the bootstrap configuration.
  5. Wait for the nodes to appear in Kubernetes.
  6. Let Refresh reconcile the actual cloud state again.

It is important to distinguish three different states: desired capacity, in-flight capacity, and joined Kubernetes nodes. A VM may be requested but not yet visible, booting but not yet joined, or joined but not yet Ready. During that period, Cluster Autoscaler must not repeatedly create more and more machines every 10 seconds.

Cluster Autoscaler also has guardrails for failed provisioning. If a node does not join within the configured provisioning duration, the autoscaler can treat that scale-up as failed and move on.

Bootstrapping with Talos

In this implementation, node bootstrap is intentionally kept outside the autoscaler’s core logic.

The node group config contains the Talos machine configuration as user data. When autoscaler-cloudscale creates a VM, it passes that user data to cloudscale.ch. Talos then handles the rest:

  • boot the custom image
  • apply machine configuration
  • use the configured certificates and join tokens
  • start kubelet
  • join the Kubernetes cluster

This keeps the provider focused on VM lifecycle management rather than becoming a full cluster lifecycle engine.

The one hard requirement is that the cluster has a working cloud controller manager. It must stamp Kubernetes nodes with a provider ID, because that is the bridge between Kubernetes objects and cloudscale.ch servers.

No provider ID means no reliable scale-down.

Demo: scale from zero workers

The demo shows a Kubernetes cluster on cloudscale.ch starting with only a control plane node and no workers. Workload pressure is then applied to trigger the autoscaler and the external provider.

To generate that pressure, the demo deploys 50 replicas of the Kubernetes pause container with small CPU and memory requests – a deliberately boring Deployment that exists only to create scheduling demand.

apiVersion: apps/v1
kind: Deployment
metadata:
  name: scale-demo
spec:
  replicas: 50
  selector:
    matchLabels:
      app: scale-demo
  template:
    metadata:
      labels:
        app: scale-demo
    spec:
      containers:
        - name: pause
          image: registry.k8s.io/pause:3.9
          resources:
            requests:
              cpu: 500m
              memory: 128Mi

The Pods could not be scheduled because there were no worker nodes. Cluster Autoscaler noticed the pending Pods, simulated whether they would fit on a node from the configured worker group, and called the external provider.

The provider created three cloudscale.ch VMs. They booted the Talos image, installed to disk, rebooted, joined the cluster, and eventually became Ready. At that point, Kubernetes could schedule some of the pending Pods onto the new workers.

The important part of the demo is not the exact terminal output. It is the separation of responsibilities:

  • Kubernetes produced pending Pods.
  • Cluster Autoscaler simulated future capacity using TemplateNodeInfo.
  • The expander selected a configured node group.
  • The externalgrpc provider created the cloudscale.ch VMs.
  • Talos bootstrapped the nodes into the cluster.
  • The CCM stamped provider IDs so the autoscaler could map Kubernetes nodes back to cloud VMs.

That makes the demo a useful validation of the whole architecture without turning the blogpost into a screen-recording transcript.

Gotchas

1. TemplateNodeInfo is easy to get subtly wrong

The autoscaler’s decision quality depends heavily on the synthetic node returned by NodeGroupTemplateNodeInfo.

If allocatable CPU or memory is too optimistic, the autoscaler may under-scale. If it is too pessimistic, it may over-scale. If ResourcePods is missing or zero, nothing will schedule at all.

This method feeds both scale-from-zero and the internal “upcoming node” logic. Treat it as part of the scheduling model, not as a cosmetic metadata method.

2. Tags are not optional

Tags are how the provider knows which cloud VMs belong to which cluster and node group.

Without consistent tags, Refresh cannot reliably reconcile state. Scale-down becomes dangerous because the provider cannot know which machine corresponds to which Kubernetes node.

3. The cloud is the source of truth

Local state is useful, but it is not authoritative.

Manual deletes, failed creates, partial outages, quota issues, and API timeouts all happen. Refresh should reconcile against the provider API every loop and rebuild the cache from reality.

4. Lock ordering matters

Provider implementations often keep shared caches plus per-node-group state. If multiple mutexes are involved, lock ordering needs to be consistent.

One subtle bug here was a potential deadlock between Refresh and target-size updates. The fix was to always acquire locks in the same order.

5. No CCM, no reliable scale-down

A cloud controller manager is not just a nice addition. It is what stamps the Kubernetes node with the providerID that lets the autoscaler map a Kubernetes Node to a cloud VM.

Scale-up can appear to work without a complete mapping. Scale-down will not be safe.

Takeaways

Writing a Cluster Autoscaler provider is less about reimplementing autoscaling and more about providing the missing cloud-specific glue.

Cluster Autoscaler already knows how to:

  • detect pending Pods
  • simulate scheduling
  • account for DaemonSets
  • apply backoff
  • choose node groups
  • avoid duplicate scale-ups
  • decide when nodes can be removed

The provider needs to know how to:

  • describe a future node accurately
  • create VMs
  • delete VMs
  • tag resources
  • reconcile cloud state
  • map Kubernetes nodes back to cloud resources
  • bootstrap machines into the cluster

With externalgrpc, that provider can live as a standalone binary with its own release cycle. For unsupported clouds, lab environments, private infrastructure providers, or sovereign cloud platforms, that is a very practical integration model.

In this case, the result was a small Go service that taught Cluster Autoscaler how to operate on cloudscale.ch without modifying the autoscaler itself.

The autoscaler remained the brain. The external provider became the hands.

That is the real value of externalgrpc. It is not the most glamorous integration point, but it is exactly the right abstraction when you want to keep autoscaling logic upstream and put cloud-specific lifecycle logic in your own hands.

If you’d like to dive deeper, check out the blog post on my personal blog, where I explore the topic in more detail.

Marco De Luca

Kontaktiere uns

Unser Expertenteam steht für dich bereit. Im Notfall auch 24/7.

Kontakt
Allgemein Event Kubernetes Sovereignty

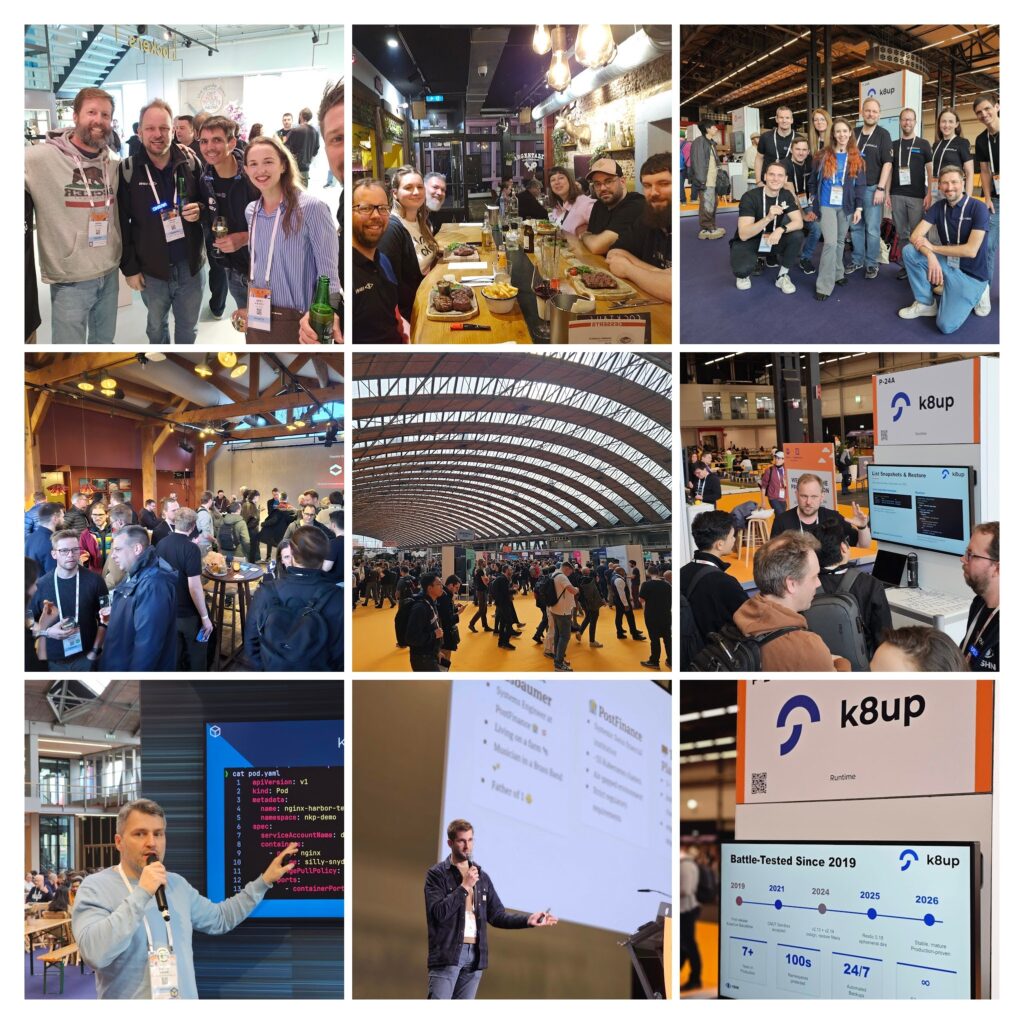
KubeCon Europe 2026 Recap – Souveränität, AI Agents und eine starke Community

26. März 2026

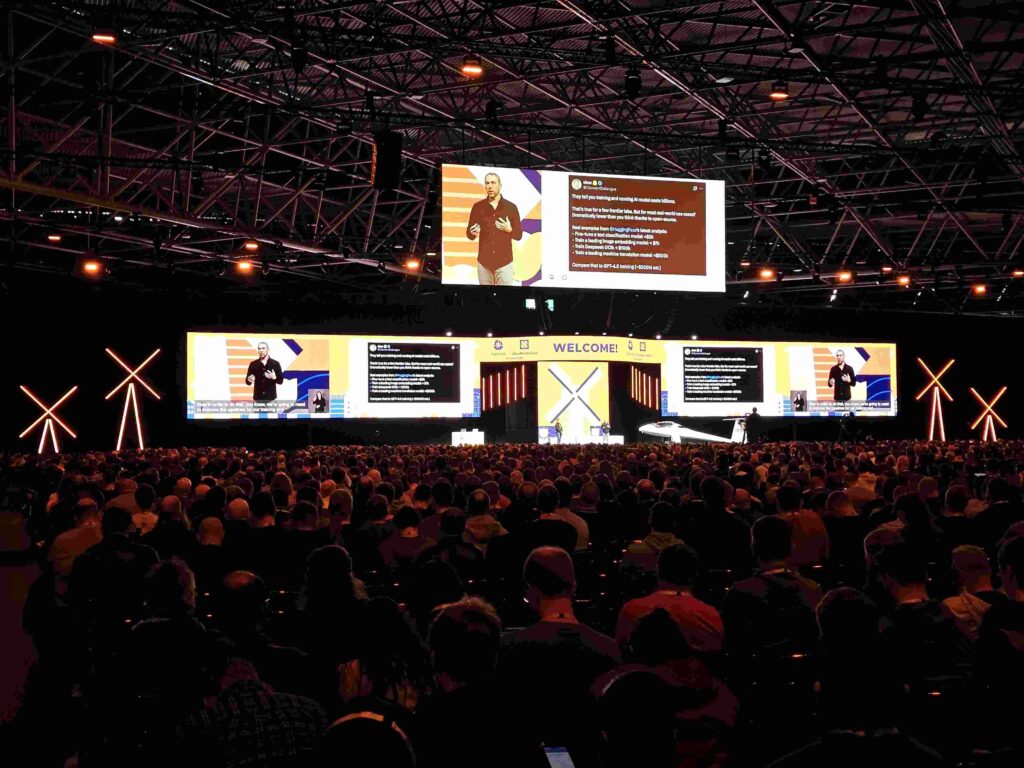
Die KubeCon + CloudNativeCon Europe 2026 in Amsterdam geht zu Ende – und hat einmal mehr gezeigt, warum dieses Event das Herz der Cloud-Native-Community ist.

Eine Woche voller Gespräche, Ideen und gemeinsamer Dynamik.

Eine klare Richtung: Souveränität und „Agentic“ AI

Zwei Themen waren dieses Jahr überall präsent.

Erstens: digitale Souveränität.
Nicht mehr als Buzzword, sondern als konkretes Ziel. In Talks und Gesprächen wurde deutlich, dass Organisationen aktiv daran arbeiten, unabhängige und resiliente Plattformen aufzubauen – basierend auf offenen Standards und offenen Ökosystemen.

Zweitens: AI – insbesondere „agentische“ Systeme.
Der Fokus hat sich klar verschoben: weg vom Experimentieren, hin zur konkreten Anwendung. Die Frage ist nicht mehr ob, sondern wie AI in Plattformen integriert wird.

K8up: Grosses Interesse und Maintainer gesucht

Ein echtes Highlight für uns war das grosse Interesse an K8up.

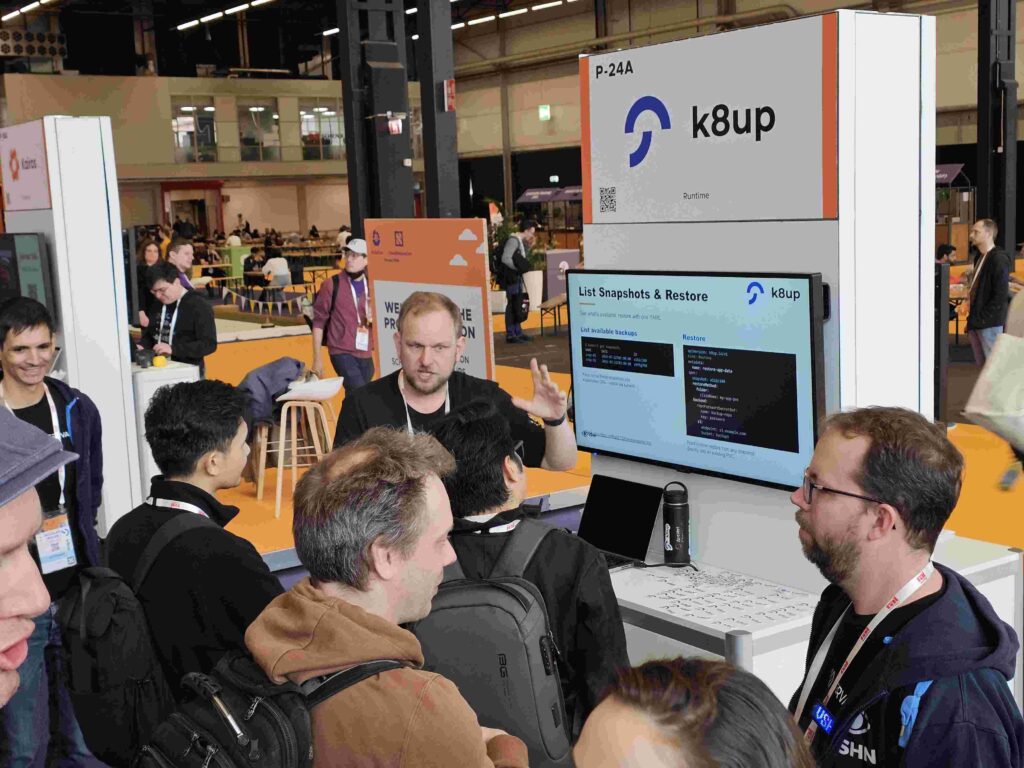
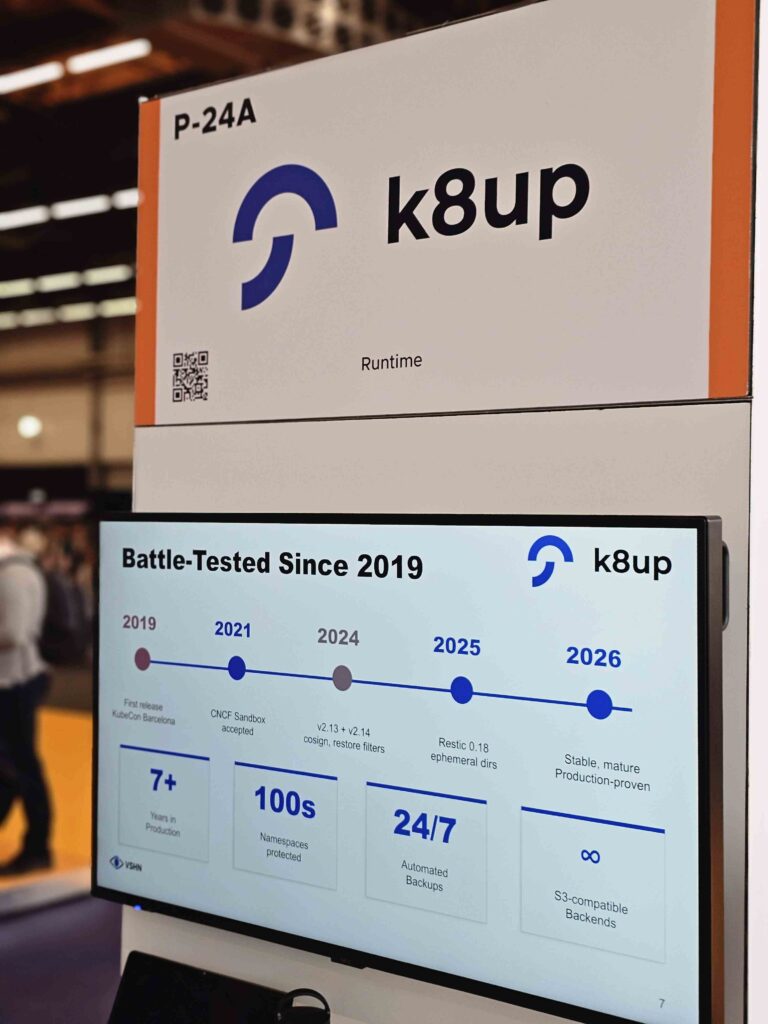
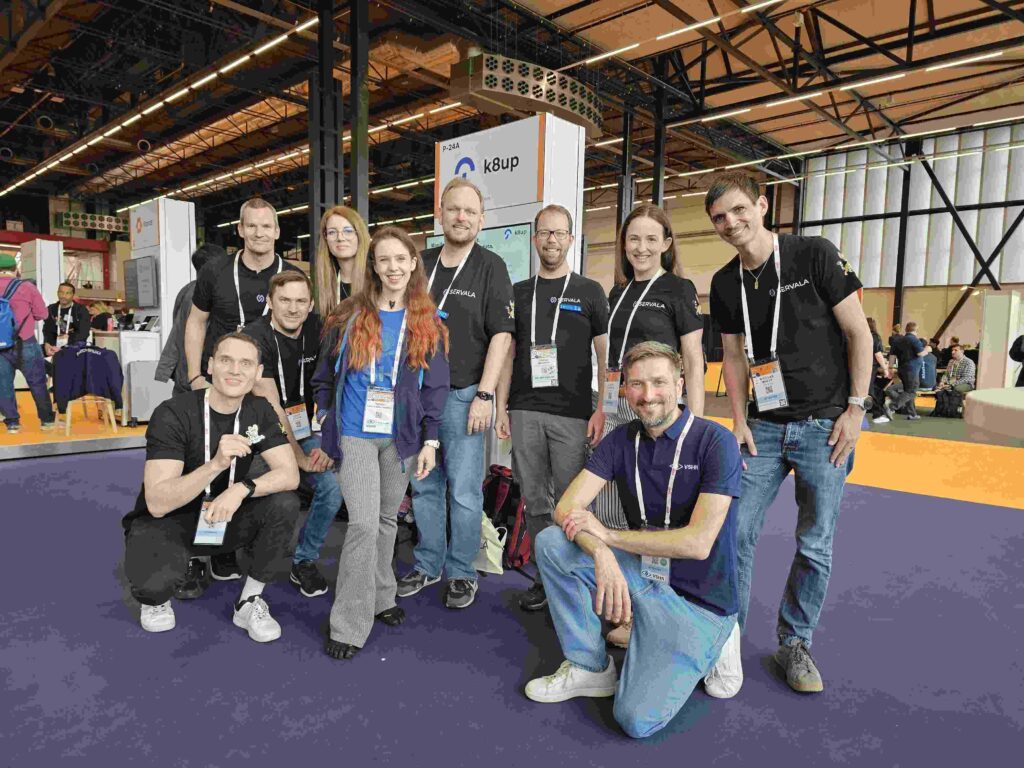
Am K8up-Kiosk im Project Pavilion hatten wir viele spannende Gespräche mit Nutzerinnen, Nutzern und potenziellen Contributor:innen.

Es wurde klar:
👉 Der Bedarf an einfachen, zuverlässigen Backup-Lösungen für Kubernetes wächst
👉 Die Community rund um K8up ist sehr engagiert
👉 Es gibt echtes Momentum, das Projekt gemeinsam weiterzuentwickeln

Gleichzeitig suchen wir aktiv Maintainer und Contributor, die K8up mitgestalten wollen.

Wenn du Lust hast, dich einzubringen, schau hier vorbei:
https://github.com/k8up-io/k8up/issues/1187

Lightning Talk: Aarno auf der Bühne

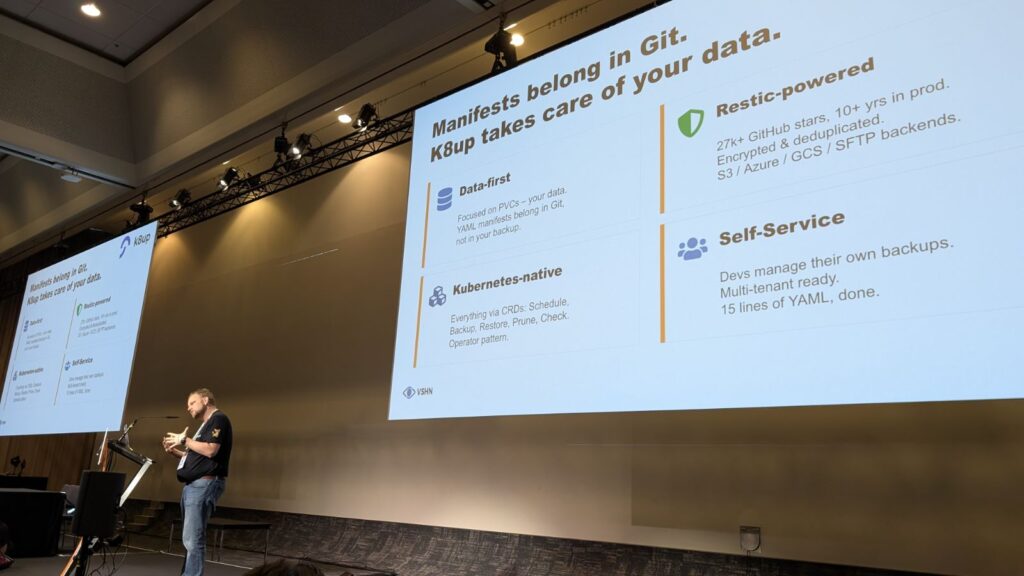
Ein besonderer Moment war der Lightning Talk von Aarno Aukia zu K8up.

Kurz, prägnant und auf den Punkt – und danach mit vielen guten Gesprächen.

(Und ja – ganz im Kubernetes-Stil wurde während eines Talks sogar ein NGINX Ingress live archiviert. Cloud Native bleibt spannend.)

Servala: Vom Konzept zum konkreten Interesse

Auch Servala – Sovereign App Store war ein grosses Thema während der Woche, nicht nur wegen den Goodie Bags für die KubeTrain Teilnehmer:

Was besonders auffiel: das gestiegene Verständnis und Interesse.

Die Gespräche haben sich klar weiterentwickelt:

  • Von „Was ist Servala?“
  • Zu „Wie können wir teilnehmen?“

Das zeigt einen klaren Trend in der Branche – hin zu Ökosystemen statt isolierten Plattformen und zu konkreten Umsetzungen von Souveränität.

Die Schweiz mit grossem Impact an der KubeCon

Was dieses Jahr besonders aufgefallen ist: Die Schweiz hat im Cloud-Native-Ökosystem einen überproportional grossen Einfluss.

Trotz ihrer Grösse stammen 3 von 48 CNCF-Projekten an der KubeCon aus der Schweiz – also rund 6%.
Dazu gehören Projekte wie Harbor, K8up und Capsule, die aktiv zur Weiterentwicklung des Ökosystems beitragen.

Und das ist nur ein Teil der Geschichte.

Wenn man grosse Beiträge wie Cilium mit einbezieht, wird der Einfluss der Schweizer Open-Source- und Engineering-Community noch deutlicher.

Doch es geht nicht nur um Projekte.

Die Schweiz war auf vielen Ebenen stark vertreten:

  • Talks und Lightning Talks
  • Maintainer und Contributors
  • Aktive Beteiligung an Diskussionen
  • Starke Präsenz an Side Events und in der Community

Diese Kombination aus technischer Exzellenz, offener Zusammenarbeit und aktiver Community macht die Schweizer Cloud-Native-Szene besonders.

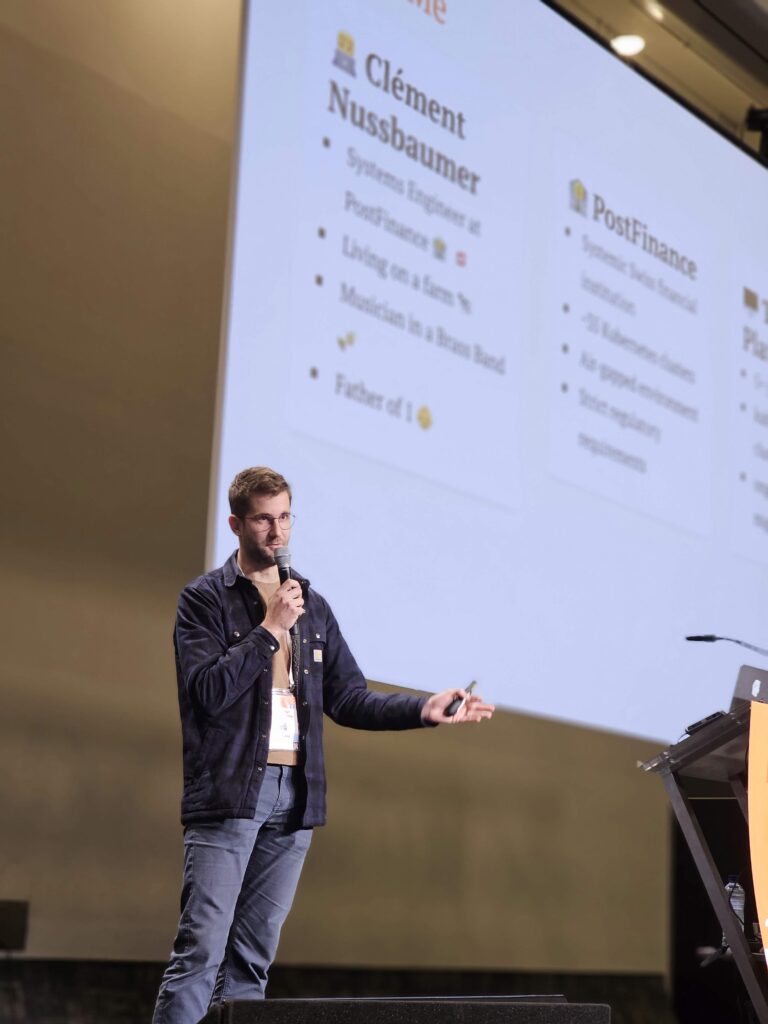
Clément Nussbaumer – PostFinance

Ein perfektes Beispiel dafür, was diese Community ausmacht:
Offen, kollaborativ und mit viel Engagement dabei.

Denn am Ende entstehen die besten Gespräche oft ausserhalb der offiziellen Sessions.

Der KubeCon Swiss Apéro – Community in Bestform

Ein weiteres Highlight war der KubeCon Swiss Apéro organisiert von Rocket Engineers.

Rund 130 Leute aus der Schweizer Cloud-Native-Community kamen in Amsterdam zusammen.

Mehr als nur Talks

Neben dem offiziellen Programm gab es auch dieses Jahr wieder viele Side-Events und Community-Momente:

  • KubeTrain
  • KubeCon Swiss Apéro
  • Events von Upbound, Isovalent und vielen mehr
  • Unzählige spontane Treffen und Diskussionen

Genau dort entstehen oft die besten Ideen und neuen Kollaborationen.

Unsere wichtigsten Learnings

Die KubeCon Europe 2026 hat einige klare Trends bestätigt:

  • Souveränität wird konkret und umsetzbar
  • AI entwickelt sich in Richtung echter Plattform-Use-Cases
  • Offene Ökosysteme ersetzen isolierte Lösungen
  • Community bleibt der zentrale Treiber

Und vielleicht am wichtigsten:

👉 Die besten Ideen entstehen nicht allein – sondern gemeinsam

Danke, Amsterdam

Ein grosses Dankeschön an alle, die wir diese Woche treffen durften – Partner, Kunden, Contributor und die gesamte Cloud-Native-Community.

Wir nehmen viele neue Impulse, Kontakte und Ideen mit nach Hause.

Bis zum nächsten Jahr in Barcelona!

Markus Speth

Marketing, Communications, People

Kontaktiere uns

Unser Expertenteam steht für dich bereit. Im Notfall auch 24/7.

Kontakt
Allgemein Kubernetes

Beste Kubernetes Distributionen 2026 – und warum du sie vielleicht nicht selbst betreiben solltest

2. März 2026

Kubernetes ist zum Rückgrat der modernen digitalen Infrastruktur geworden – es treibt alles an, von SaaS-Plattformen bis hin zu unternehmenskritischen Systemen im Gesundheitswesen, in der Finanzbranche und in der öffentlichen Verwaltung.
Doch eine Sache wird immer noch weit unterschätzt: Kubernetes allein reicht nicht.

Der Betrieb von Kubernetes in Produktion erfordert weit mehr als das Upstream-Projekt. Du brauchst Netzwerk, Storage, Observability, Security-Hardening, Upgrade-Tooling und operative Prozesse – alles eng integriert und kontinuierlich gepflegt.

Genau hier kommen Kubernetes-Distributionen ins Spiel.

Und wenn du diese Komplexität nicht selbst betreiben möchtest, gibt es eine Abstraktionsebene höher: Managed Kubernetes oder Managed OpenShift.

In diesem Beitrag werfen wir einen Blick auf die Kubernetes-Distributionslandschaft im Jahr 2026 und erklären, warum das Auslagern des Betriebs oft die klügste Wahl ist.

Was ist Kubernetes?

Kubernetes (K8s) ist das Open-Source-Orchestrierungssystem für containerisierte Anwendungen. Ursprünglich von Google entwickelt, hat es sich zum De-facto-Standard für das Deployment, die Skalierung und den Betrieb von Containern in Cloud-, Hybrid- und On-Premises-Umgebungen etabliert.

Heute wird Kubernetes von der Cloud Native Computing Foundation (CNCF) verwaltet, die eine herstellerneutrale Entwicklung, offene Standards und eine starke Community-getriebene Roadmap gewährleistet.

Kubernetes selbst ist am besten als Motor zu verstehen.
Um wirklich voranzukommen, brauchst du das drum herum gebaute Auto – und genau das liefern Kubernetes-Distributionen.

Wenn du mehr über Kubernetes selbst erfahren möchtest – was es tut und wie es moderne Anwendungen antreibt – schau dir das an: Was ist Kubernetes? Der Motor der digitalen Welt einfach erklärt.

Kubernetes-Versionsunterstützung im Jahr 2026

Die aktuelle Kubernetes-Version per 2. März 2026 ist v1.35. Das Kubernetes-Projekt pflegt Release-Branches für die drei neuesten Minor-Releases (aktuell 1.35, 1.34, 1.33). Kubernetes 1.19 und neuer erhält ca. 1 Jahr Patch-Unterstützung. Kubernetes 1.18 und älter erhielt ca. 9 Monate Patch-Unterstützung.

Zu jedem Zeitpunkt befinden sich die drei neuesten Minor-Versionen im Mainstream-Support, wobei jedes Release für ca. 14 Monate unterstützt wird. Regelmässige Upgrades sind also keine Option – sie sind eine zentrale operative Anforderung.

Branchenberichte zeigen konsistent, dass die Mehrheit der Produktionscluster unterstützte Versionen einsetzt, ein erheblicher Anteil jedoch aufgrund operativer Komplexität hinterherhinkt. Laut dem Kubernetes-Adoptionsbericht 2025 von Datadog laufen 78 % der Hosts auf Kubernetes-Versionen im Mainstream-Support, 19 % auf älteren Versionen mit erweitertem Support und nur 3 % auf nicht mehr unterstützten Releases. Das zeigt, wie wichtig regelmässige Updates und Lifecycle-Management in Produktionsumgebungen geworden sind – und wie leicht sie in selbstverwalteten Setups vernachlässigt werden.

Was definiert eine Kubernetes-Distribution?

Ähnlich wie bei Linux – wo der Kernel mit Treibern, Dienstprogrammen und Konfiguration zu einem vollständigen Betriebssystem (einer Linux-Distribution) kombiniert wird – muss auch Kubernetes mit wesentlichen Tools und Diensten gebündelt werden, um in der Produktion nutzbar zu sein. Genau das leistet eine Kubernetes-Distribution.

Genau wie es verschiedene Linux-Distributionen für unterschiedliche Bedürfnisse gibt – wie Ubuntu, Debian oder Red Hat Enterprise Linux (RHEL) – gibt es auch viele Kubernetes-Distributionen, jede mit anderen Kompromissen bei Benutzerfreundlichkeit, Support, Performance und Ökosystem-Integration.

Eine Kubernetes-Distribution ist eine vorkonfigurierte Version von Upstream-Kubernetes, die die Kernkomponenten (API-Server, Scheduler, Controller-Manager usw.) mit den Tools und Diensten kombiniert, die für einen zuverlässigen Betrieb benötigt werden.

Typische Funktionen, die von Distributionen gebündelt werden:

  • Installer- und Upgrade-Tooling für Control Plane und Worker Nodes
  • Networking (CNI), Ingress und manchmal Service Mesh
  • Storage-Unterstützung durch CSI-Treiber und Backup-Integration
  • Sicherheitsfunktionen wie Authentifizierung, RBAC und Audit-Logs
  • Monitoring, Logging und Alerting (oft auf Basis von Prometheus und verwandten Tools)
  • Developer-Tooling wie GitOps-Pipelines, CLI oder Dashboards

Eine Distribution hilft dabei, das Setup zu standardisieren, den Integrationsaufwand zu reduzieren und Best Practices zu folgen. Aber selbst die beste Distribution muss noch installiert, aktualisiert, gepatcht und betreut werden – und damit kommen wir zur nächsten Ebene.

Kubernetes und Red Hat OpenShift im Jahr 2026

Red Hat OpenShift ist wahrscheinlich die bekannteste Kubernetes-Distribution und verfolgt einen klar meinungsstarken Ansatz. Sie baut auf Upstream-Kubernetes auf und erweitert es zu einer vollständigen Anwendungsplattform.

Wesentliche Merkmale von OpenShift:

  • Vollständiges Lifecycle-Management und Upgrades
  • Integrierte Developer-Experience mit Pipelines, GitOps und Image-Builds
  • OperatorHub für lifecycle-verwaltete Services
  • Starke Multi-Tenancy, Zugriffskontrolle und Policy-Durchsetzung
  • Integrierte Observability- und Compliance-Fähigkeiten

OpenShift ist von Anfang an für den Produktionsbetrieb ausgelegt, insbesondere in regulierten Umgebungen oder grossen Organisationen, die Konsistenz und Governance schätzen.

Die aktuelle OpenShift-4.21-Plattform (veröffentlicht im Februar 2026) basiert auf Kubernetes 1.34 und CRI-O 1.34. Sie festigt OpenShifts Position als vertrauenswürdige und umfassende Anwendungsplattform, auf der KI-Workloads, Container und Virtualisierung Seite an Seite laufen – in hybriden Cloud-Umgebungen, mit integrierten Tools und Services für cloud-native, virtuelle und traditionelle Anwendungen.

Wenn du in einer regulierten Branche tätig bist oder eine Plattform brauchst, die von Anfang an produktionsbereit ist, ist OpenShift ein starker Kandidat. Wenn du Flexibilität bevorzugst oder ein minimales Setup möchtest, passen andere Distributionen vielleicht besser.

Die Kubernetes-Distributionslandschaft im Jahr 2026

Es gibt Dutzende von Kubernetes-Distributionen, die meisten fallen jedoch in vier praktische Kategorien.

Enterprise-Grade Kubernetes-Distributionen

Für grosse und regulierte Umgebungen mit starken Anforderungen an Lifecycle-Management und Governance konzipiert:

  • Red Hat OpenShift – funktionsreiche, hochintegrierte Plattform mit integrierter Governance, Observability und Developer-Tooling
  • VMware Tanzu Kubernetes Grid – eng integriert mit vSphere und Enterprise-Lifecycle-Tooling
  • D2iQ Kubernetes Platform (DKP) – fokussiert auf Multi-Cluster-, Hybrid- und Edge-Betrieb mit starken Lifecycle- und Governance-Fähigkeiten
  • Mirantis Kubernetes Engine (MKE) – gehärtete Enterprise-Distribution mit Unterstützung für Air-Gapped- und FIPS-konforme Umgebungen
  • Rancher RKE2 – sichere Kubernetes-Distribution mit Fokus auf Hybrid- und Multi-Cluster-Betrieb

Enterprise-Distributionen bieten oft Lifecycle-Automatisierung (Upgrades, Patching), gehärtete Sicherheit (CIS-Benchmarks, FIPS) und Tools für konsistente Multi-Cluster-Policy-Durchsetzung und Hybrid-Cloud-Deployment.

Cloud-Managed Kubernetes-Services

Diese Dienste abstrahieren einen Grossteil der Control Plane und bieten Kubernetes als Service an:

  • Amazon Elastic Kubernetes Service (EKS)
  • Google Kubernetes Engine (GKE)
  • Azure Kubernetes Service (AKS)
  • IBM Cloud Kubernetes Service, Oracle OKE und andere

Diese sind ideal, wenn du Kubernetes nutzen möchtest, ohne die Infrastruktur selbst zu verwalten. Sie sind eng in ihre jeweiligen Cloud-Ökosysteme integriert und übernehmen die Upgrades für dich.

Leichtgewichtige und Edge-optimierte Kubernetes-Distributionen

Perfekt für IoT, entlegene Standorte oder ressourcenbeschränkte Umgebungen:

  • k3s (von Rancher) – Single-Binary-Kubernetes für Edge, CNCF-zertifiziert
  • k0s (von Mirantis) – minimal, deklarativ und ideal für eingebettete oder Hybrid-Deployments
  • MicroK8s – Canonicals Snap-basierte Distribution für Edge und Dev/Test
  • Talos Linux + Kubernetes – vollständig immutabel und API-getrieben

Diese Distributionen priorisieren einen kleinen Footprint, minimale Abhängigkeiten und geringen operativen Aufwand.

Self-Hosted Open-Source-Kubernetes-Distributionen

Diese Open-Source-Kubernetes-Distributionen richten sich an Teams, die vollständige Kontrolle und Flexibilität über ihre Cluster möchten. Sie kommen ohne Vendor-Lock-in, erfordern aber mehr operativen Aufwand.

  • OKD – Community-Distribution, die das Upstream von Red Hat OpenShift bildet
  • RKE2 (Rancher Kubernetes Engine 2) – sichere, gehärtete Kubernetes-Distribution von Rancher
  • Charmed Kubernetes – Canonicals meinungsstarker, aber modularer Kubernetes-Stack
  • Talos Linux + Kubernetes – vollständig immutables und API-verwaltetes Linux-Betriebssystem für Kubernetes

Sie bieten Flexibilität, aber Lifecycle-Management, Upgrades und Integrationen bleiben in deiner Verantwortung.

Warum Managed Kubernetes oder Managed OpenShift wählen?

Selbst mit einer gut gestalteten Distribution bleibt der Betrieb von Kubernetes komplex.

Teams sind verantwortlich für:

  • Cluster-Health, Verfügbarkeit und Skalierung
  • Regelmässige Upgrades und Sicherheits-Patching
  • Incident-Response und Troubleshooting
  • Governance über mehrere Cluster oder Umgebungen
  • Compliance und Audit-Bereitschaft

Managed-Kubernetes- und Managed-OpenShift-Services existieren genau dafür, um diese Last abzunehmen.

Bei VSHN betreiben wir Kubernetes- und OpenShift-Cluster mit klaren SLAs und produktionsreifen Prozessen, darunter:

  • Automatisierte Upgrades und Lifecycle-Management
  • 24/7 SLA-gesichertes Monitoring und Incident-Response
  • Konsistente Multi-Cluster-Governance und Policy-Durchsetzung
  • Integration mit Managed-Datenbanken, Identity und Observability-Services
  • Unterstützung für hybride, Multi-Cloud- und Sovereign-Cloud-Umgebungen
  • Nachgewiesene Compliance mit ISO 27001, ISAE 3402 Report Type 2, KCSP und Red Hat Premier CCSP

Mit einem Managed-Ansatz braucht dein Team keine tiefgehende Kubernetes-Betriebsexpertise im Haus. Du kannst dich auf Anwendungen, Innovation und Delivery konzentrieren – während wir die Komplexität der zugrundeliegenden Plattform übernehmen.

Warum Talos Managed Kubernetes noch stärker macht

Moderne, immutable Grundlagen wie Talos Linux verändern grundlegend, wie Kubernetes-Cluster betrieben werden.

Talos eliminiert ganze Klassen von operativen und Sicherheitsrisiken durch Design:

  • Kein SSH-Zugang
  • Kein Paketmanager
  • Kein Configuration Drift
  • Vollständig deklarativ und API-getrieben

In einem verwalteten Setup ermöglicht Talos hochgradig standardisierte, reproduzierbare und sichere Cluster im grossen Massstab.
Upgrades werden vorhersehbar, rollback-sicher und auditierbar – was Talos besonders attraktiv für regulierte und souveräne Umgebungen macht.

In Kombination mit verwaltetem Betrieb repräsentiert Talos eine klare Richtung für die Zukunft von Kubernetes: immutabel, automatisiert und zuverlässig.

Also – welche Kubernetes-Distribution solltest du wählen?

Eine kurze Orientierungshilfe je nach Bedarf:

  • Vollwertige Plattform für Hybrid-Cloud mit Enterprise-Unterstützung? → Red Hat OpenShift
  • Cloud-native Services mit minimalem operativen Aufwand bevorzugt? → EKS, GKE, AKS
  • Leichtgewichtiges, minimales oder Edge-fähiges Setup benötigt? → k3s oder k0s
  • Vollständige Kontrolle und Bereitschaft zur Eigenverantwortung? → RKE2, MicroK8s, OKD
  • Vorteile ohne operativen Aufwand gewünscht? → Entscheid dich für einen Managed-Kubernetes- oder Managed-OpenShift-Anbieter wie VSHN

Fazit

Im Jahr 2026 hat sich Kubernetes als Motor der digitalen Welt fest etabliert. Von cloud-nativen Anwendungen bis hin zu unternehmenskritischen Systemen in Unternehmen und dem öffentlichen Sektor ist Kubernetes zur Grundlage moderner IT-Plattformen geworden.

Die Wahl der richtigen Kubernetes-Distribution ist jedoch nur der erste Schritt. Die eigentliche Herausforderung liegt darin, Kubernetes über die Zeit sicher, zuverlässig und regelkonform zu betreiben – insbesondere in komplexen, regulierten oder schnell wachsenden Umgebungen.

Im Enterprise-Bereich hat sich Red Hat OpenShift als De-facto-Standard herausgebildet. Die Kombination aus ausgereiftem Lifecycle-Management, integrierter Sicherheit, starken Governance-Mechanismen und einem umfassenden Toolchain für Entwickler und Betreiber macht OpenShift zur ersten Wahl für viele Organisationen – insbesondere dort, wo Compliance, Skalierbarkeit und operative Stabilität entscheidend sind.

Gleichzeitig zeigen leichtgewichtige und moderne Distributionen wie k3s, k0s und Talos, wohin sich die Kubernetes-Technologie entwickelt. Immutable, API-getriebene und hochautomatisierte Plattformen reduzieren operative Komplexität und Angriffsoberflächen erheblich. Ihr volles Potenzial entfalten sie jedoch erst, wenn sie standardisiert und professionell verwaltet betrieben werden.

Genau hier kommen Managed Kubernetes, Managed OpenShift und Cloud Platform Operations ins Spiel. Sie verbinden moderne Plattformtechnologien mit bewährten operativen Prozessen, klaren SLAs und kontinuierlicher Verbesserung. Teams können sich auf Anwendungen, Innovation und Geschäftswert konzentrieren, ohne tiefgehende Kubernetes-Betriebsexpertise im Haus halten zu müssen.

Ob OpenShift im Enterprise-Umfeld, Cloud-managed Kubernetes oder moderne immutable Plattformen wie Talos – der entscheidende Faktor ist nicht die Distribution selbst, sondern ein Betriebsmodell, das konsistent Sicherheit, Stabilität und Skalierbarkeit liefert.

Wer Kubernetes nachhaltig, sicher und zukunftssicher betreiben möchte, für den ist ein Managed-Ansatz oft der effektivste Weg – sowohl technisch als auch organisatorisch.

👉 Erfahre mehr über unser Angebot:

Markus Speth

Marketing, Communications, People

Kontaktiere uns

Unser Expertenteam steht für dich bereit. Im Notfall auch 24/7.

Kontakt
Allgemein Event Kubernetes

VSHN an der KubeCon Europe 2026 in Amsterdam – wir freuen uns auf dich!

11. Dez. 2025

KubeCon + CloudNativeCon Europe 2026 – die Cloud-Native-Community trifft sich wieder in Amsterdam

Vom 23. – 26. März 2026 kehrt die KubeCon + CloudNativeCon Europe wieder ins wunderschöne Amsterdam zurück und lädt tausende Cloud-Native-Praktikerinnen und -Praktiker, Platform Engineers, SREs, Entwicklerinnen und Entwickler sowie Open-Source-Begeisterte ein. Für VSHN ist dieses Event seit Jahren eines der wichtigsten Treffen der Community und 2026 ist keine Ausnahme.

Wir sind die ganze Woche vor Ort, vernetzen uns mit der Community, lernen die neuesten CNCF-Entwicklungen kennen, teilen unsere Erfahrungen im Betrieb zuverlässiger Kubernetes- und OpenShift-Plattformen und treffen Partner, Kundinnen und Kunden sowie Freundinnen und Freunde aus der Szene.

Community Support – KubeTrain und KubeTrain Party

Wir freuen uns sehr, die Community als Sponsor des KubeTrain 2026 und der KubeTrain Party zu unterstützen.

  • KubeTrain – 22. März 2026: Eine unterhaltsame und nachhaltige Reise für alle, die gemeinsam zur KubeCon nach Amsterdam fahren. Die Initiative bringt Cloud-Native-Fans in einem Zug zusammen und sorgt bereits unterwegs für Networking und gute Gespräche.
  • KubeTrain Party – 22. März 2026: Nach der Ankunft geht es direkt weiter mit der offiziellen KubeTrain Party. Drinks, Musik, Networking und ein grossartiger Start in die KubeCon-Woche.

Triff uns beim KubeCon Swiss Apéro

  • Swiss Apéro – 24. März 2026: Auch beim KubeCon Swiss Apéro 2026 sind wir vor Ort und sponsern den Event. Der Swiss Apéro findet im Beach House, Strandzuid, Europaplein 22, 1078 GZ Amsterdam ab 18:30 Uhr statt. Du kannst dich auf einen Abend voller Austausch zu Kubernetes, OpenShift, Platform Engineering, digitaler Souveränität, Servala und mehr freuen.

Warum du uns an der KubeCon treffen solltest

VSHN ist nicht einfach ein weiterer Kubernetes-Dienstleister. Seit über zehn Jahren prägen wir die Cloud-Native-Landschaft in der Schweiz und darüber hinaus.

Darum lohnt sich ein Gespräch mit uns:

  • Wir sind der erste Schweizer Kubernetes Certified Service Provider (KCSP)
  • Wir sind der erste Schweizer Red Hat Premier CCSP Partner
  • Wir betreiben Kubernetes– und OpenShift-Plattformen für Organisationen in ganz Europa und darüber hinaus
  • Wir bauen und betreiben Servala – the Sovereign App Store. Servala verbindet Unternehmen, Entwickler und Cloud Provider mit sicheren, skalierbaren und benutzerfreundlichen Cloud-Native Services und Applikationen
  • Application Catalog – eine grosse Auswahl an Managed Services, die sich nahtlos in deinen Entwicklungs-Workflow integrieren lassen
  • APPUiO – Experten-Hosting für Experten-Software-Engineers basierend auf OpenShift
  • VSHN Solutions – VSHN Solutions als dein DevOps-Enabler – Individuell. Modular. Skalierbar.
  • Wir helfen Teams, Developer Productivity, Zuverlässigkeit und Betriebsqualität zu steigern
  • Wir leben Open Source, Zusammenarbeit und nachhaltige Ökosysteme
  • Wir entwickeln aktiv die Cloud Native Community weiter

Unser Blogpost „Was ist Kubernetes? Der Motor der digitalen Welt einfach erklärt“ erklärt die Grundlagen von Kubernetes leicht verständlich.

Unser CNCF Sandbox Project – K8up

Wir haben auch unser eigenes CNCF Sandbox Project: K8up, einen Backup Operator für Kubernetes und OpenShift, der Teams hilft, Backup- und Restore-Prozesse sicher und automatisiert zu betreiben. Als aktive Maintainer tragen wir dazu bei, das Open-Source-Ökosystem zu stärken und zuverlässige Werkzeuge für die Kubernetes-Community bereitzustellen.

Community Engagement – Organisatoren der grössten Cloud Native Meetup Gruppe der Schweiz

Wir sind Organisator der Cloud Native Computing Switzerland Meetup Gruppe mit über 3000 Mitgliedern, einer der aktivsten Tech-Communities des Landes.

Unser nächstes Cloud Native Computing Meetup findet am 10. März 2026 im VSHNtower in Zürich statt – spannende Talks, Austausch und Networking inklusive. Sei dabei!

Und falls du einen Talk beitragen möchtest, melde dich unter: https://cnc-meetup.ch/.

Worauf wir uns an der KubeCon 2026 besonders freuen

  • Die Weiterentwicklung des Kubernetes-Ökosystems
  • Platform Engineering als Schlüsseldisziplin moderner Software-Teams
  • Digitale Souveränität und europäische Alternativen
  • KI-unterstützter Betrieb und intelligentere Automatisierung
  • Neue CNCF-Projekte, die die Zukunft von Cloud Native prägen

Lass uns in Amsterdam treffen

Wenn du an der KubeCon Europe 2026 teilnimmst, möchten wir dich unbedingt treffen. Egal ob du über Kubernetes-Betrieb, OpenShift, Servala, Cloud-Native-Strategien, Backups mit K8up oder einfach bei einem Kaffee sprechen möchtest – melde dich bei uns.

Du findest uns:
🚆 Im KubeTrain
🎉 An der KubeTrain Party
🫕 Beim Swiss Apéro
🇳🇱🌷🚲 Überall auf der KubeCon in Amsterdam

Wir freuen uns auf dich in Amsterdam. Lass uns gemeinsam die Zukunft von Cloud Native gestalten.

Markus Speth

Marketing, Communications, People

Kontaktiere uns

Unser Expertenteam steht für dich bereit. Im Notfall auch 24/7.

Kontakt
Allgemein Event Kubernetes

KCD Suisse Romande 2025 at CERN – Community, Cloud Native, and Two Great Days in Geneva

5. Dez. 2025

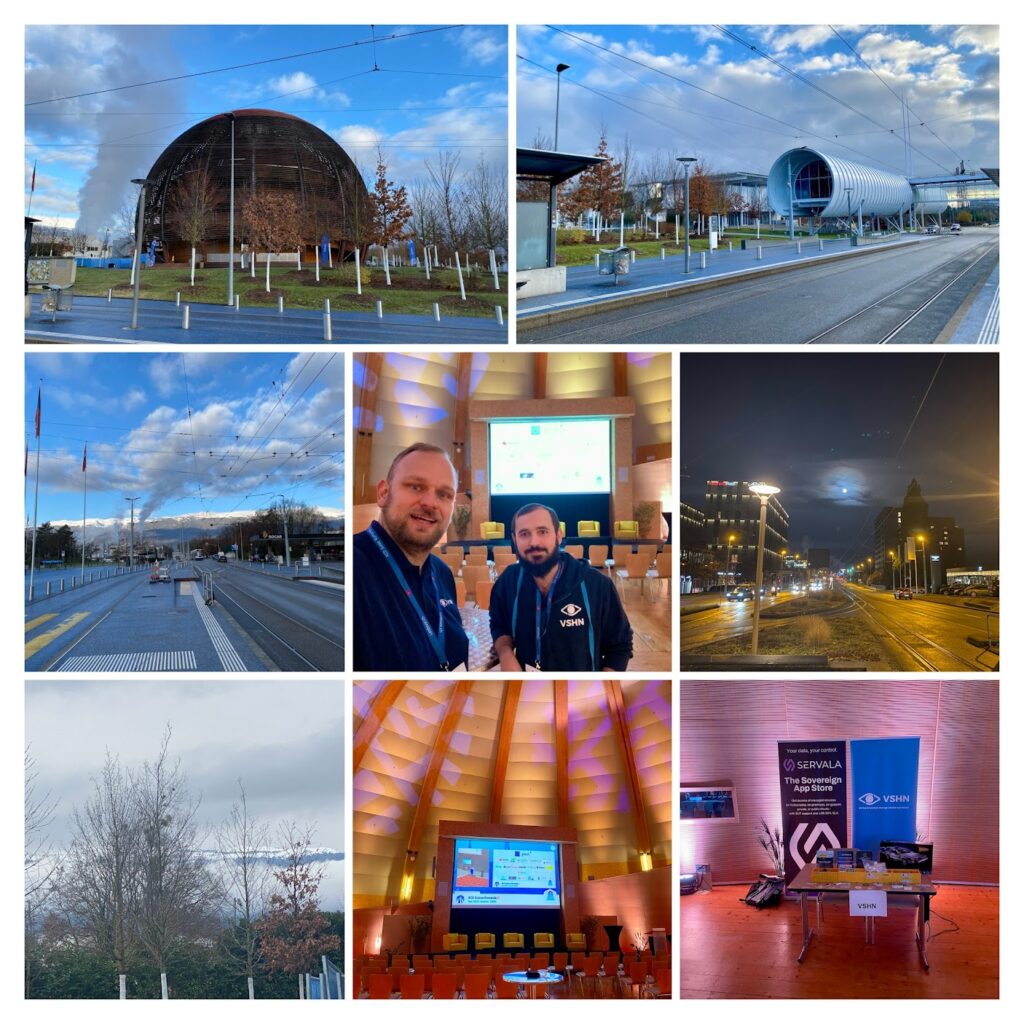
The first Kubernetes Community Days Suisse Romande took place on December 4-5, 2025 – and what a venue: CERN Science Gateway in Geneva. A place where science meets innovation made the perfect backdrop for the local cloud native community to come together, share ideas, learn, and collaborate.
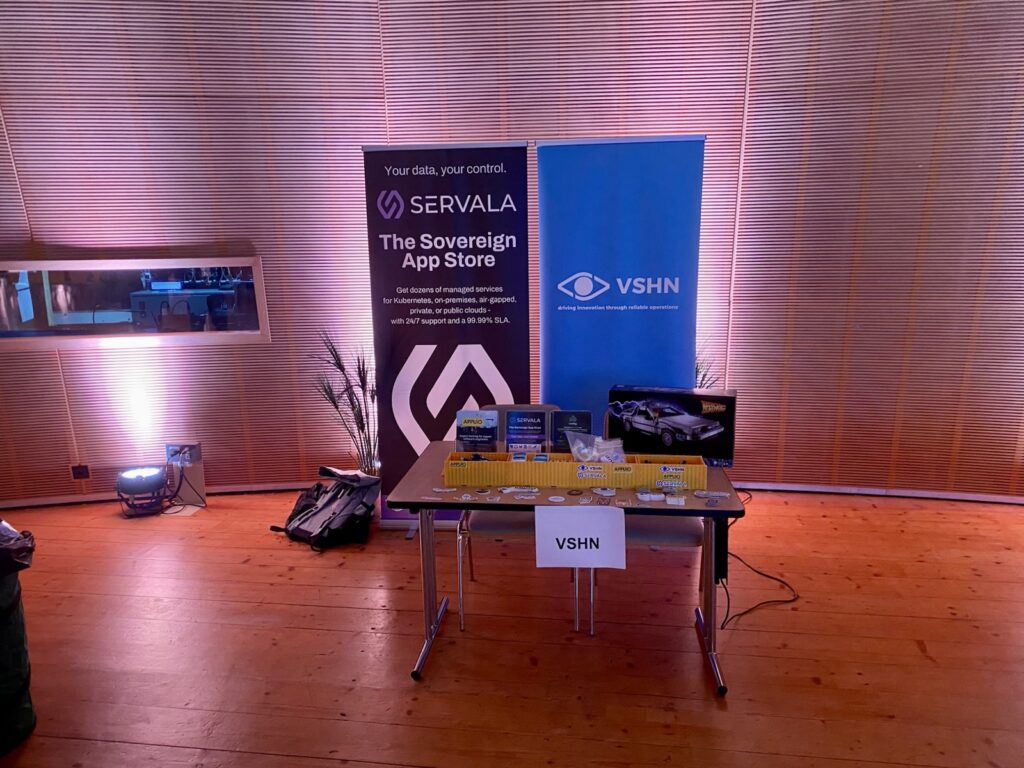
VSHN was proud to be Silver Sponsor of the KCD.

Around 300 participants from Switzerland and beyond gathered for two days filled with workshops, sessions, hallway talks, and a whole lot of Kubernetes energy. The atmosphere was fantastic – friendly, curious, and buzzing with exchange. Exactly what KCDs should be about.

Workshops, Talks and Great People

Day 1 kicked off with three parallel hands-on workshops, followed by CERN and LHC tours for those lucky enough to grab a spot. The combination of technology and the magic of CERN definitely created excitement early on.

Day 2 continued with even more workshops – and later the stage belonged to the speakers. Nearly 50 sessions touched on Kubernetes, platform engineering, open source tooling, DevOps culture, security, AI topics and more. Talks were held in French and English, highlighting the multilingual and open nature of the Swiss tech scene.

Among the featured speakers were well-known community voices including:

  • Jessie Frazelle – Zoo.dev
  • Sarah Novotny – Kosai / Operant AI
  • Mauricio Salatino – LearnK8s
  • Aurélie Vache – OVHcloud
  • Engin Diri – Pulumi
  • Shérine Khoury – Red Hat
  • Luc Juggery – Exoscale
  • Kasper Nissen – Lunar

But beyond names and sessions, what stood out most were conversations in the corridors, shared learnings, and genuine collaboration. Networking at events like this is where ideas turn into projects.

Why Events like KCD Matter

KCDs are community-driven by design – organized for practitioners and by practitioners, supported by CNCF. They create a space where we meet as peers, share solutions, discuss challenges, and grow together. For us at VSHN, this is exactly the spirit we believe in.

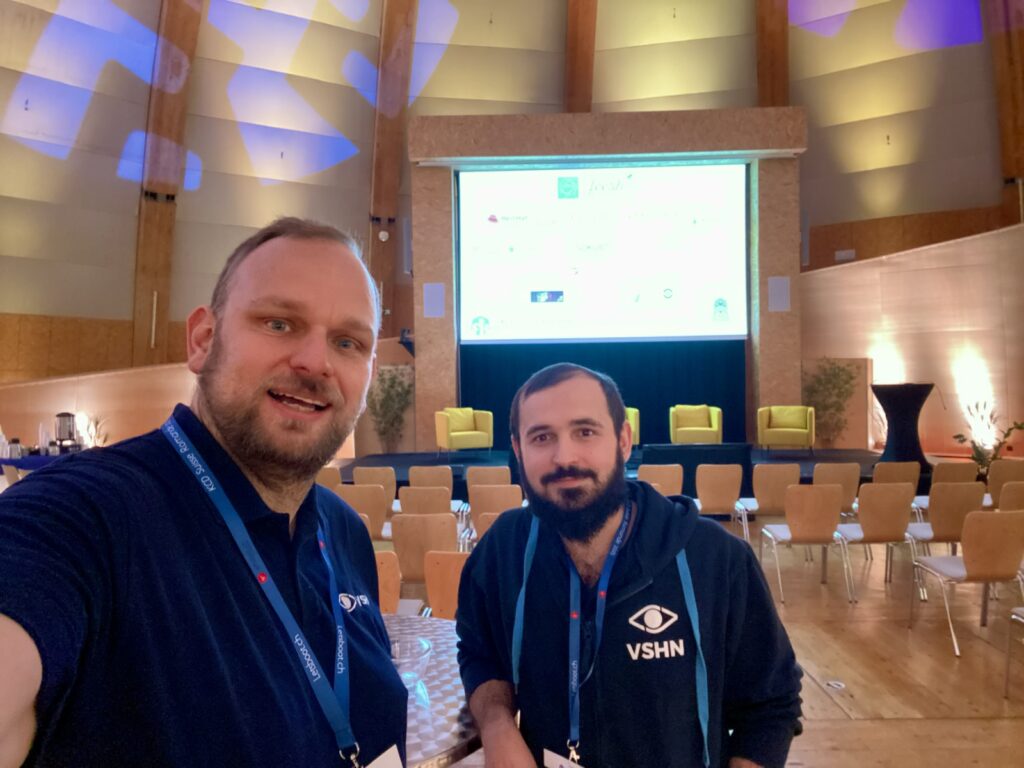
Cloud native is evolving fast – platforms, automation, developer experience, sovereignty, and AI are changing how we build and operate software. Meeting the community in person helps everyone stay ahead and shape what’s next. Aarno and Pierre were very happy to meet so many interested people.

See You Again in 2026

A huge thank you to the Cloud Native Suisse Romande organizers, all speakers, sponsors, and every participant we met at the booth.
We loved the conversations, the exchange, and the energy inside CERN.

Already looking forward to next year!

📬 Want to continue the conversation about Kubernetes, OpenShift, or Servala?
Reach out – we’re happy to connect.

👉 More info about KCD Suisse Romande

Aarno Aukia

Aarno ist Mitgründer der VSHN AG und als CTO für die technische Begeisterung zuständig.

Kontaktiere uns

Unser Expertenteam steht für dich bereit. Im Notfall auch 24/7.

Kontakt
Allgemein Kubernetes

Was ist Kubernetes? Der Motor der digitalen Welt einfach erklärt

22. Juli 2025

1. Für alle Neugierigen ohne Technik-Background – Was sind Container und was ist Kubernetes?

Stell dir das weltberühmte Schweizer Logistiksystem vor: Züge, Lastwagen, Flugzeuge und, na ja, nicht allzu viele Schiffe, die allesamt zuverlässig Waren durch Berge, Täler, Städte und über Grenzen hinweg transportieren.

Jetzt stell dir ein paar Güterzüge vor: Jeder Waggon ist mit einem Container beladen und in jedem Container steckt ein bestimmtes Produkt – Käse aus Gruyères, Uhren aus Biel oder Schokolade aus Bern.

In der digitalen Welt funktionieren Software-Container genauso. Jeder Container transportiert eine bestimmte Anwendung oder einen Dienst – zusammen mit allem, was er zum Laufen braucht: Code, Konfigurationen und Abhängigkeiten. So kann er überall betrieben werden – auf deinem Laptop, im Rechenzentrum oder in der Cloud.

Aber was, wenn du Hunderte oder Tausende solcher Container gleichzeitig betreibst? Alle müssen geladen, überwacht, geroutet, bei Problemen neu gestartet und bei Bedarf hochskaliert werden.

Hier kommt Kubernetes ins Spiel.

So wie ein Logistikzentrum Züge, Flugzeuge und LKWs koordiniert, organisiert Kubernetes deine Software-Container. Es entscheidet, wo sie laufen sollen, überwacht ihren Zustand, startet sie neu, wenn nötig, skaliert sie automatisch – alles ohne dein Zutun.

Ursprünglich wurde Kubernetes von Google entwickelt – basierend auf dem internen System „Borg“ – und 2014 als Open Source veröffentlicht. Heute wird es von der Cloud Native Computing Foundation und einer globalen Community weiterentwickelt.

Und selbst wenn du noch nie von Kubernetes gehört hast – du nutzt es wahrscheinlich täglich. Von Online-Banking über E-Commerce bis zu Streaming-Diensten – viele der Apps, die du verwendest, laufen im Hintergrund auf Kubernetes.

Nur ein Beispiel:

Kurz gesagt:

  • Ein Container ist ein standardisiertes Softwarepaket, das überall laufen kann
  • Kubernetes ist das clevere System, das Tausende Container effizient betreibt
  • Ohne Kubernetes müsste jeder Container manuell verwaltet werden – wie Güterverkehr ohne Signale, Fahrpläne oder zentrale Steuerung

Ein paar Ideen, wie du Kubernetes in einem Satz erklären kannst: 😊

2. Ein bisschen technischer – Was Kubernetes eigentlich macht

Moderne Anwendungen sind nicht mehr monolithisch – sie sind modular, Cloud-Native und zunehmend rund um DevOps-Prinzipien aufgebaut. Statt Software direkt auf fixen Servern zu installieren, verpacken Teams ihre Anwendungen in Container – schlanke, isolierte Einheiten mit allem, was eine App braucht.

Stell dir vor, du betreibst:

  • 50 Services
  • 500 Container
  • In verschiedenen Umgebungen (Entwicklung, Test, Produktion)
  • In einer Mischung aus Public Cloud, eigenen Servern und Edge-Standorten

Das manuell zu verwalten ist nicht nur schwierig – es ist nahezu unmöglich. Genau hier hilft Kubernetes.

Kubernetes löst Probleme wie:

  • Container automatisch starten und stoppen – je nach Bedarf.
  • Container bei Fehlern neu starten.
  • Dienste verfügbar und reaktionsschnell halten.
  • Updates ausrollen – ohne Ausfallzeiten.
  • Lasten verteilen, um Überlastungen zu vermeiden.

Beispiele aus der Praxis:

  • Handel: Online-Shops nutzen Kubernetes, um Traffic-Spitzen wie z.B. beim Black Friday abzufangen. Kubernetes skaliert bei Bedarf hoch und wieder runter, um Kosten zu sparen.
  • Finanzen: Banken betreiben hochverfügbare Anwendungen mit maximaler Sicherheit – und veröffentlichen gleichzeitig regelmässig neue Funktionen.
  • Gesundheitswesen: Patientendatenplattformen setzen auf Kubernetes, um Ausfallsicherheit, Datenschutz und Zugriffskontrolle zu garantieren.
  • SaaS: Softwarefirmen liefern schneller aus, betreiben mehrere Versionen parallel und sparen Infrastrukturkosten.

Ohne Kubernetes müssten Dev- und Ops-Teams weiterhin auf Skripte und manuelle Schritte setzen – was Innovation bremst und die Fehleranfälligkeit erhöht

3. Für alle Tech-Neugierigen – Cluster, Distributionen und was VSHN macht

Was ist ein Kubernetes-Cluster?

Ein Kubernetes-System nennt man Cluster. Es besteht aus:

  • Control Plane: Das Gehirn des Systems, entscheidet, was wo laufen soll.
  • Worker Nodes: Die Server, auf denen die Container tatsächlich laufen.
  • Services und Tools: Sorgen für Sicherheit, Transparenz und Stabilität.

Ein Cluster kann klein sein – auf deinem Laptop – oder riesig und global verteilt über Rechenzentren.

Was ist eine Kubernetes-Distribution?

Kubernetes ist Open Source – aber es gibt verschiedene „Distributionen“ – ähnlich wie bei Linux (z. B. Ubuntu, Red Hat). Diese Distributionen basieren auf dem gleichen Kern, bieten aber zusätzliche Features und Support.

Beispiele für Kubernetes-Distributionen sind:

  • Vanilla Kubernetes – die pure Open-Source-Version.
  • Red Hat OpenShift – mit erweiterten Sicherheitsfeatures, Entwickler-Tools und Enterprise-Support.
  • Rancher – für Multi-Cluster- und Edge-Szenarien.
  • EKS, AKS, GKE – die Kubernetes-Angebote von AWS, Azure und Google.

Jede Distribution hat ihre Stärken – sei es Compliance, Entwicklerfreundlichkeit oder Kosteneffizienz.

Was VSHN mit Kubernetes macht

Bei VSHN ist Kubernetes das Rückgrat all unserer Services.

Wir sind der erste Schweizer Kubernetes Certified Service Provider (KCSP) und der erste Schweizer Red Hat Premier CCSP Partner – offizielle Auszeichnungen für unsere Kompetenz und unser Engagement für das Kubernetes-Ökosystem

Wir betreiben Hunderte Kubernetes-Cluster für Startups, Banken und Behörden – in der Public Cloud, Private Cloud, On-Premises oder in souveränen Schweizer oder EU-Clouds wie Exoscale, Cloudscale oder IONOS.

Unsere Angebote:

  • Managed OpenShift – Wir richten deinen OpenShift-Cluster ein und übernehmen Betrieb, Sicherheit, Monitoring, Updates und Backups.
  • APPUiO – Experten-Hosting für Experten-Software-Engineers.​ Unser OpenShift Project-as-a-Service, ideal für den kostengünstigen Einstieg in Kubernetes. Teste APPUiO kostenlos auf appuio.cloud/register mit dem Code: K8s2025
  • Servala – Sovereign App Store – Unsere neue Plattform: Managed Services wie Datenbanken, Developer-Tools und Monitoring mit wenigen Klicks.

Wir haben über die Jahre Automatisierungs-Frameworks, Monitoring-Tools und Best Practices entwickelt – damit du dich auf deine Software konzentrieren kannst und nicht auf die Infrastruktur.

Und wir haben daraus Open-Source-Projekte geschaffen:

  • K8up – Ein Kubernetes-Backup-Operator und CNCF Sandbox Projekt.
  • Project Syn – Ein modulares Toolset zum sicheren Management ganzer Kubernetes-Flotten.

Wo stehen Red Hat, OpenShift und VSHN im Eisenbahn-Vergleich?

Bleiben wir bei unserer Schweizer-Logistik-Metapher:

  • Kubernetes ist das Schienennetz, die Signale, Weichen und das Kontrollzentrum.
  • Red Hat OpenShift ist der Premium-Güterzugbetreiber – mit besseren Lokomotiven, mehr Sicherheit und mehr Bedienkomfort.
  • VSHN ist dein Logistikpartner und Zugbetreiber – wir betreiben und warten das Netzwerk, die Züge und sogar die Ladung. Wir sorgen dafür, dass alles pünktlich, skalierbar und sicher läuft.

Mit unseren Lösungen laden wir sogar die Container für dich, halten sie im Blick und sorgen für Stabilität.

Und Servala? Stell dir ein modernes Verteilzentrum neben dem Rangierbahnhof vor – dort holst du dir fertige Container (Datenbanken, Monitoring, Developer-Tools), die wir für dich ausliefern und betreiben.

In diesem Bild:

  • Red Hat baut das System und liefert die Premium-Züge (OpenShift).
  • VSHN betreibt das System für dich (Managed OpenShift, VSHN Lösungen).
  • Du konzentrierst dich auf die Fracht (deine Apps) – wir sorgen dafür, dass alles reibungslos läuft.

Warum dich das interessieren sollte – auch wenn du kein Dev bist

Kubernetes steckt hinter vielen Services, die du täglich nutzt:

  • Online-Banking
  • E-Commerce
  • Streaming
  • Digitale Behördendienste

Kubernetes ist ausserdem ein zentraler Baustein für DevOps – es hilft Teams, schneller und effizienter zusammenzuarbeiten – mit automatisierter Infrastruktur und wiederverwendbaren Workflows.

Für Unternehmen bedeutet das:

  • Schnellere Markteinführung – Features täglich statt quartalsweise deployen.
  • Höhere Zuverlässigkeit – Systeme erholen sich automatisch bei Fehlern.
  • Kosteneffizienz – Nur Ressourcen nutzen, wenn du sie wirklich brauchst.
  • Anbieterfreiheit – Keine Cloud-Abhängigkeit, volle Flexibilität.

TL;DR

Im Jahr 2025 ist Kubernetes kein Luxus mehr – sondern die Grundlage moderner IT. Nicht nur für Tech-Giganten – sondern für jedes Team, das schneller und besser arbeiten möchte. Kubernetes automatisiert die Bereitstellung, Skalierung und den stabilen Betrieb moderner Anwendungen – in der Cloud, On-Premises oder hybrid.

Bei VSHN machen wir Kubernetes einfach, zuverlässig und zugänglich – damit du grossartige digitale Produkte bauen kannst.

Mehr erfahren

Neugierig, wie Kubernetes dir helfen kann? Schreib uns – wir zeigen’s dir gern.

Disclaimer: Der Text wurde teilweise von einem Menschen geschrieben.

Markus Speth

Marketing, Communications, People

Kontaktiere uns

Unser Expertenteam steht für dich bereit. Im Notfall auch 24/7.

Kontakt
Kubernetes Tech

Stay Ahead of the Game with Kubernetes

13. Jan. 2023

Kubernetes is a powerful platform for deploying and managing containerized applications at scale, and it has become increasingly popular in Switzerland in recent years.

One way to approach it is outsourcing. This can be a strategic and cost-effective option for organizations that do not have the in-house DevOps expertise, know-how, or resources to manage their infrastructure and application operations efficiently.

Not every tech company is in the business of building platforms and operating Kubernetes clusters. Thus by partnering with an experienced partner, companies can tap into a wealth of knowledge and expertise to help them run their applications.

Some companies adopt Kubernetes and look to leverage its capabilities themselves. It’s essential to consider time, effort, and possible implications while utilizing the latest developments and continually adding value to the core business.

In all cases, it will be helpful to align with fundamentals. For this reason, I have compiled a quick guide to Kubernetes in 2023 and best practices in Switzerland.

  1. Understand the basics: Before diving into Kubernetes, have a solid understanding of the reasoning and concepts. This could include cloud infrastructure, networking, containers, how they liaise with each other, and how they can be managed with Kubernetes.
  2. Plan your deployment carefully: When deploying applications with Kubernetes, you must plan thoroughly and consider your workloads‘ specific needs and requirements. This includes but is not limited to resource requirements, network connectivity, scalability, latency, and security considerations.
  3. Use appropriate resource limits: One of the critical benefits of Kubernetes is its ability to manage resources dynamically based on the needs of your applications. To take advantage of this, try to set appropriate resource limits for your application. This will help ensure that your application has the resources they need to run effectively while preventing them from consuming too many resources and impacting other applications.
  4. Monitor your application: It’s essential to monitor your applications and the underlying Kubernetes cluster to ensure they are running smoothly and to identify any issues that may arise. You want to analyze the alerts and react accordingly. You can use several tools and practices to monitor your applications, including log analysis, monitoring with tools like Prometheus and Grafana, and alerting systems.
  5. Use appropriate networking configurations: Networking is critical to any Kubernetes deployment, and choosing the proper network configuration is substantial. What about load balancing, service discovery, and network segmentation?
  6. Secure your application: Security is a top concern for many companies and organizations in Switzerland. You cannot proceed without ensuring that your Kubernetes deployment is secure. At this stage, your team is implementing network segmentation, using secure container runtime environments, and implementing advanced authentication and authorization systems.
  7. Consider using a managed Kubernetes service: For companies without the resources or needing DevOps expertise to manage their clusters, managed Kubernetes services can be a business-saving solution. With managed services, you can get a production-ready cluster, i.e., a fully-managed Kubernetes environment, allowing teams and software engineers to focus on developing new features and deploying their applications rather than managing the underlying infrastructure.
  8. Stay up-to-date with the latest developments: The Kubernetes ecosystem is constantly evolving, and it’s better to stay up-to-date with the latest developments and best practices. This may involve subscribing to newsletters like VSHN, VSHN.timer, or Digests, attending conferences and CNCF meetups, and following key players in the Kubernetes community.

By following best practices, IT leaders, stakeholders, and decision-makers can ensure that they use Kubernetes constructively and get the most out of the platform technology.

Aarno Aukia

Aarno ist Mitgründer der VSHN AG und als CTO für die technische Begeisterung zuständig.

Kontaktiere uns

Unser Expertenteam steht für dich bereit. Im Notfall auch 24/7.

Kontakt
Kubernetes Tech

Was ist eine Kubernetes Distribution und was sind die Unterschiede zwischen Kubernetes und OpenShift?

30. Aug. 2018

Update: hier findest du unsere Kubernetes Distributionen 2026 Übersicht.

Bei VSHN und APPUiO.ch setzen wir auf OpenShift als Kubernetes Distribution. Was eine Kubernetes Distribution ist, warum wir das machen und wo die Unterschiede zu „plain“ Kubernetes liegen erklären wir in diesem Blogpost.

Was ist Kubernetes?

Die offizielle Beschreibung von Kubernetes lautet:

Kubernetes is a portable, extensible open-source platform for managing containerized workloads and services, that facilitates both declarative configuration and automation.

Der wichtigste Teil daraus ist die Tatsache, dass es sich um eine Plattform handelt und nicht um ein fertiges Produkt ab der Stange. Für das Verständnis dieses Beitrags ist dies eine wichtige Information.

Was ist eine Kubernetes Distribution?

Um die Unterschiede von Kubernetes und OpenShift zu verstehen, gilt es zuerst einmal den Begriff „Kubernetes Distribution“ zu klären: Wird Kubernetes direkt aus dem Open Source Kubernetes Projekt installiert, erhält man „nur“ die Kernkomponenten (API Server, Controller Manager, Scheduler, Kubelet, kube-proxy). Damit Kubernetes aber auch wirklich benutzbar wird, benötigt man sehr viele weitere Komponenten wie etcd, Ingress Controller, Logging Server, Metrics Collector (z.B. Prometheus), Software Defined Network (SDN) und viele mehr. Dies ist sehr gut vergleichbar mit Linux: Der Linux Kernel alleine bringt noch nicht viel, es braucht eine ganze Linux Distribution welche eine Shell, das Paketmanagement, den Bootprozess und vieles mehr zur Verfügung stellt.

OpenShift ist eine Kubernetes Distribution und macht aus Kubernetes ein Produkt

Eine „Minimum Viable Kubernetes Distribution“ benötigt folgende zusätzlichen Komponenten und Tools für einen produktiven Betrieb:

  • Installations- und Upgrademechanismus: Für eine automatisierte Installation aller involvierten Komponenten.
  • SDN (Software Defined Network): Pods müssen untereinander kommunizieren können, egal wo sie laufen. Dies stellt das SDN sicher.
  • Ingress Controller: Damit Benutzerzugriff auf die auf dem Cluster laufende Applikationen möglich ist.
  • Authentication: Eine zentrale Benutzer- und Gruppendatenbank stellt den authentisierten und autorisierten Zugriff zur Verfügung.
  • Security: Kubernetes führt Container via Docker oder CRI-O aus. Die Sicherheit auf dem Hostsystem muss entsprechend gewährleistet sein.
  • Persistent Storage: Stateful Applikationen wie Datenbanken benötigen persistenten Storage.
  • Monitoring: Ständige Überwachung aller Clusterkomponenten und Applikationen.
  • Backup: Sicherung der Clusterkomponenten und Persistenten Daten.

Optional werden weitere Komponenten empfohlen:

  • Zentrales Logging mit grafischer Aufbereitung und Durchsuchbarkeit
  • Applikations- und Cluster Metrics inkl. Alerting

OpenShift als Kubernetes Distribution

Im Kern basiert OpenShift zu 100% auf Kubernetes, bringt aber als Kubernetes Distribution alles mit, was zur Benutzung eines Kubernetes Clusters benötigt wird. Um nur die wichtigsten Funktionen zu nennen:

  • Operations ToolsEin offizieller und unterstützter Weg via Ansible ermöglicht den gesamten Lifecycle von OpenShift durchzuführen. Dazu gehört die automatisierte Installation, wie auch Upgrades auf neuere Versionen von OpenShift.
  • Router: Der OpenShift Router (Ingress Controller) – basierend auf HAProxy – sorgt dafür, dass der Zugriff auf Applikationen innerhalb des Clusters über HTTP(S) ermöglicht wird.
  • Multi-Tenancy: Die im Kern eingebaute Multi-Tenancy über OpenShift Projekte, RBAC und weitere Konzepte ermöglicht die Benutzung der Plattform durch verschiedene Stakeholder.
  • Authentication: Es werden die unterschiedlichsten Authentication Backends unterstützt, allen voran LDAP, ActiveDirectory und weitere.
  • Metrics: Die mitgelieferte Metrics Komponente sammelt alle verfügbaren Messwerte (RAM, CPU, Netzwerk) der auf dem Cluster laufenden Applikationen und visualisiert diese in der Webkonsole.
  • Central Logging: Alle von der Applikation auf stdout geloggten Zeilen werden automatisch von der zentralen Logging Komponente gesammelt und über die Webkonsole dem Benutzer zur Verfügung gestellt.
  • Security: Die Plattform ist auf höchste Sicherheit ausgelegt. So sorgen z.B. Sicherheitsmassnahmen im Kernel von Red Hat Enterprise Linux wie SELinux dafür, dass die Sicherheit der Container gewährleistet ist. Weitere Massnahmen wie „Security Context Constraints“ (SCC) und das Verhindern von Root Containern sorgen für weitere Sicherheit.
  • Builds und Pipelines: Direkt im Cluster integrierte Build- und Pipeline-Funktionalitäten ermöglichen einen komplett integrierten CI/CD Workflow.
  • Webkonsole: Alle Vorgänge auf dem Cluster werden für den Anwender der Plattform in einer Webkonsole graphisch dargestellt und ermöglichen einen einfachen und schnellen Einstieg in die Benutzung von Kubernetes.
  • SDN: Das mitgelieferte Software Defined Networking sorgt für die Konnektivität zwischen den auf der Plattform laufenden Pods und für eine angemessene Netzwerksicherheit mit Network Policies.
  • Container Registry: Docker / Container Images werden in der mitgelieferten Registry gespeichert und zum Deployment auf die Worker Nodes benutzt.

Alle diese von Haus aus mitgelieferten Funktionalitäten lassen sich zu jedem Kubernetes Cluster hinzufügen, was jedoch mit einem hohem Aufwand verbunden ist. Vergleichbar mit dem Bau einer eigenen Linux Distribution, wie das z.B. Linux From Scratch veranschaulicht. Für Kubernetes existiert eine ähnliche Anleitung, genannt Kubernetes The Hard Way.

OpenShift als PaaS

Die Stärke von Kubernetes liegt in der Container Orchestrierung. Zusätzlich dazu bietet OpenShift klassische Platform-as-a-Service (PaaS) Funktionen. Eine davon ist das automatische builden und deployen von Applikationscode direkt ab einem Git Repository. Trotzdem hat man als Anwender der Plattform dank der grossen Flexibilität aber immer die Wahl, ob man die integrierten Buildfunktionen nutzen möchte, oder doch lieber ausserhalb des Cluster builden möchte. Dies lässt sich für jedes Deployment entscheiden, so können auf einem Cluster beide Arten verwendet werden.

OpenShift als Upstream zu Kubernetes

Viele Entwicklungen in Kubernetes stammen ursprünglich aus OpenShift. Als bestes Beispiel lässt sich RBAC (Role Based Access Control) nennen. Dieses Feature ist seit der ersten OpenShift-Version Bestandteil und wurde sukzessive in Kubernetes eingebaut. RBAC ist seit Kubernetes Version 1.6 fester Bestandteil von Kubernetes. Auch das OpenShift „Route“- oder das „DeploymentConfiguration“-Objekt hat die heutigen Objekte „Ingress“ bzw. „Deployment“ in Kubernetes massgeblich mitgeprägt.
Da OpenShift zu 100% auf Kubernetes basiert, werden auch alle Kubernetes Native Workloads unterstützt, wie z.B. das „Deployment“- oder das „Ingress“-Objekt.
Schaut man etwas genauer auf die Contributor-Statistiken stellt man fest, dass Red Hat zu den Top 3 Contributor-Firmen gehört, somit ist Red Hat massgeblich an der Entwicklung von Kubernetes beteiligt. Mit dem Kauf der Firma CoreOS hat sich Red Hat geballtes Kubernetes Know-how angeeignet. Die Verschmelzung von OpenShift und Tectonic wird der nächste Meilenstein der Kubernetes Distribution OpenShift sein.

Alternativen zu OpenShift

OpenShift ist nicht die einzige Kubernetes Distribution auf dem Markt. Ein kurzer Vergleich zeigt die Unterschiede:

  • Cloud Vendor Kubernetes: Die grossen Clouds bieten ihre eigenen Kubernetes Distributionen als Service an. Diese sind auf die jeweiligen Clouds zugeschnitten und werden von den Anbietern gepflegt. Eine Installation auf der eigenen Private Cloud oder auf anderen Public Clouds ist nicht möglich.
  • Rancher: Seit der Version 2.0 fokussiert sich Rancher zu 100% auf Kubernetes und bietet als grosse Stärke eine Multi-Cluster Verwaltungsfunktion. So können mit Rancher Kubernetes Cluster in der Cloud (z.B. auf Amazon oder Google) zentral verwaltet werden, wie auch Kubernetes Cluster mit der „Rancher Kubernetes Engine“ auf eigenen VMs. Mit dem Webinterface gestaltet sich das aufsetzen eines neuen Clusters sehr einfach und Applikationsdeployments mittels Helm sind auch direkt verfügbar.
  • Tectonic: Diese Distribution legt grossen Wert auf Cloud-Native-Automatisierung. Durch den Kauf von CoreOS durch Red Hat wird Tectonic mit OpenShift zusammengeführt und viele der Funktionen werden von Tectonic in OpenShift eingebracht.
  • Canonical / Ubuntu Kubernetes: Plattform basierend auf Ubuntu, welches Juju als Installationstool verwendet. In Partnerschaft mit Google und Rancher wird in Zukunft eine Hybrid-Cloud-Lösung angeboten.
  • SUSE CaaS-Plattform: Eine sehr neue Plattform, basierend auf SUSE MicroOS. Mittels Salt wird die Konfigurationsverwaltung sichergestellt. Unter folgendem Link kann am Beta Programm teilgenommen werden: SUSE CaaS Platform Beta.

Weitere Kubernetes Distributionen aufgelistet:

Ein sehr wichtiger zu beachtender Aspekt ist der Cloud- und/oder Vendor-Lock-In. Viele der Kubernetes Distributionen haben ihre eigenen Eigenschaften, die unter Umständen nicht miteinander kompatibel sind. Am Beispiel der „Cloud-Vendor“-Distributionen: Diese können nur in der entsprechenden Cloud benutzt werden. Möchte man jedoch einen Hybrid-Cloud-Ansatz verfolgen, ist dies durch den Lock-In nicht möglich. Im Gegenzug ermöglicht eine selber installierbare Distribution wie OpenShift diese Option.
Reine Open Source Distributionen ohne Herstellersupport sind für produktive Umgebungen nicht zu empfehlen, da dieser für eine komplexe Plattform wie Kubernetes von grossem Vorteil ist.

APPUiO – Swiss Container Platform

Dem aufmerksamen Leser ist bestimmt aufgefallen, dass zwischen der „Minimum Viable Kubernetes Distribution“ und OpenShift gewisse Diskrepanzen bestehen. Genau dort setzt APPUiO an: Wir veredeln OpenShift zu einer vollständigen, production-ready Kubernetes Distribution indem wir Managed Services anbieten. Wir überwachen und sichern den Clusterstatus automatisch, kümmern uns um regelmässige Updates, beheben Fehler, stellen Persistent Storage zur Verfügung und helfen mit unserem Know-how das Beste aus der Plattform herauszuholen.

Weitere Informationen zum Thema Kubernetes und OpenShift

Am Cloud Native Meetup vom 28. August 2018 haben wir über das Thema Kubernetes Distribution berichtet, die Slides dazu sind auf Speaker Deck zu finden. Mehr zum Thema OpenShift, Docker und Kubernetes findest du ausserdem hier. Ein weiterer empfehlenswerter Blogpost zu diesem Thema von Tomasz Cholewa: 10 most important differences between OpenShift and Kubernetes (englisch, technisch).

Wie können wir helfen?

Durch unsere Erfahrung im Betrieb von OpenShift Clustern rund um die Welt bieten wir Managed OpenShift Cluster auf nahezu jeder Public, Private oder On-Premise Cloud an. Oder besteht Interesse an einer anderen Kubernetes Distribution als OpenShift? Wir helfen gerne bei der Evaluation, Integration und Betrieb und unterstützen mit unserer langjährigen Kubernetes Erfahrung.
Kontaktiere uns, folge uns auf Twitter oder wirf einen Blick auf unsere Services.
Wir freuen uns auf dein Feedback!

Tobias Brunner

Tobias Brunner arbeitet seit über 20 Jahren in der Informatik und seit bald 15 Jahren im Internet Umfeld. Neue Technologien wollen ausprobiert und darüber berichtet werden.

Kontaktiere uns

Unser Expertenteam steht für dich bereit. Im Notfall auch 24/7.

Kontakt